 |
 10-26-2018, 06:46 AM
|
#1
|
|
Junior Member
Join Date: Mar 2017
Posts: 3
|
water in taillights
Hi all I have a 2016 3010 Sunseeker class c motorhome. Have a problem with water getting into rear tail lights. How should I rectify this for future. Cannot keep paying service guys to fix things. Senior lady needs help!! I'm in southern Ontario Canada.
|

|

|
|
10-26-2018, 12:24 PM
|
#2
|
|
Senior Member
Join Date: Apr 2016
Posts: 1,011
|
Msttoad, is the water sitting inside the red lens or is the water getting BEHIND the lights and into the camper wall? A picture if possible would help. Jay
|
|
|
|
|
10-26-2018, 01:47 PM
|
#3
|
|
Senior Member
Join Date: Apr 2016
Location: Port Charlotte Fl/Hinsdale Ma
Posts: 4,823
|
Quote:
Originally Posted by Mstoad

Hi all I have a 2016 3010 Sunseeker class c motorhome. Have a problem with water getting into rear tail lights. How should I rectify this for future. Cannot keep paying service guys to fix things. Senior lady needs help!! I'm in southern Ontario Canada.
|
If inside the lens drill two drain holes on the bottom. Use clear silicone lightly on 3 sides of the lens. leave the bottom open.
If behind the lights ( I would look anyway) seal the holes were the wires go in
|
|
|
|
|
10-26-2018, 07:37 PM
|
#4
|
|
Member
Join Date: Mar 2016
Posts: 61
|
I have the same problem on my 2016 3010DS. The suggested solutions confuse me because these are LED taillights. The condensation is on the inside of the lens wich is also the component board surface for the LED's. In Vermont this will not pass inspection. They replaced it and a month later the new one looks just like the old with condensation in there. Can you provide more clarification on the suggested fix please.
|
|
|
|
|
10-26-2018, 08:17 PM
|
#5
|
|
Senior Member
Join Date: Apr 2016
Location: Port Charlotte Fl/Hinsdale Ma
Posts: 4,823
|
Quote:
Originally Posted by kins83
I have the same problem on my 2016 3010DS. The suggested solutions confuse me because these are LED taillights. The condensation is on the inside of the lens wich is also the component board surface for the LED's. In Vermont this will not pass inspection. They replaced it and a month later the new one looks just like the old with condensation in there. Can you provide more clarification on the suggested fix please.
|
drill a drail whole in the bottom of the lense.
|
|
|
|
|
10-27-2018, 03:00 PM
|
#6
|
|
Junior Member
Join Date: Mar 2017
Posts: 3
|
Hi we did drill a small hole and hopefully have resolved the problem
|
|
|
|
|
10-28-2018, 07:47 AM
|
#7
|
|
Senior Member
Join Date: Aug 2015
Location: SW Ohio
Posts: 4,655
|
We have a full width slot at the bottom of the lights that stops condenstation .
__________________
2016 sunseeker 2250slec 
1988 Jayco p.u.,Coleman Plantation p.u.,1989 Jayco class c, Coachman TT,1995 Little Eddie fthwheel,2007 Heartland Sundance 2500 lS fthwheel
|
|
|
|
|
10-28-2018, 07:59 AM
|
#8
|
|
Site Team
Join Date: Mar 2008
Location: Louisville, KY
Posts: 10,525
|
Quote:
Originally Posted by geeman53
We have a full width slot at the bottom of the lights that stops condenstation .
|
A close up photo would be very helpful.
__________________
Peace!
Dan & Rita D
2017 Nissan Titan 5.6L King cab 4wd
2016 Evergreen Everlite 242RBS
29' empty nest model. Blue Ox WD hitch
(1 queen bed, large main cabin and huge bathroom)
Camping days 2010-53, 2011-47, 2012-41, 2013-41, 2014-31, 2015-40, 2016-44, 2017-63, 2018-75, 2019-32, 2020-41, 2021-49, 2022-43, 2023-66

|

|
|
|
10-28-2018, 12:20 PM
|
#9
|
|
Senior Member
Join Date: Oct 2015
Posts: 107
|
Our original lights had two screws attaching the backup light lens to the red portion of the light. Because they were leaking, we had the lights replaced with an updated version when we were at the 2016 FROG Rally. The updated ones have four screws attaching the backup light lens.
The leaking stopped for a while with the new lights, but we did have one additional problem. While attempting to tighten things down due to a new leak, I discovered that one of the upper mounting screws for the left light had a stripped out mounting hole. I glued some pieces of toothpick into the hole and remounted the light. Now they stay dry inside and have been so for nearly two years.
The lights have to be very tightly mounted to avoid leaks. Just be careful not to tighten to the point of cracking them.
__________________
2016 Sunseeker 2300C
"The whole problem with the world is that fools and fanatics are always so certain of themselves, and wiser people so full of doubts." - Bertrand Russell
|
|
|
|
|
10-28-2018, 03:28 PM
|
#10
|
|
Site Team
Join Date: Mar 2008
Location: Louisville, KY
Posts: 10,525
|
IF tightening them keeps out the moisture then the answer is easy.
Remove the lens.
Dry thoroughly!!!!
Apply a tiny bead of your favorite flexible
white caulk to the edge of the lens.
Go around each screw and put a tiny dab under the screw heads.
Re-attach lens.
I had to do the above to my previous Rockwood on all the clearance lights.
They all leaked.
Some leaked inside!!
The tiny bead of caulk stopped all the leaks and you can't see it because even tho the lens is amber or red the side of the rig is white so the caulk doesn't show.
Go camping!
__________________
Peace!
Dan & Rita D
2017 Nissan Titan 5.6L King cab 4wd
2016 Evergreen Everlite 242RBS
29' empty nest model. Blue Ox WD hitch
(1 queen bed, large main cabin and huge bathroom)
Camping days 2010-53, 2011-47, 2012-41, 2013-41, 2014-31, 2015-40, 2016-44, 2017-63, 2018-75, 2019-32, 2020-41, 2021-49, 2022-43, 2023-66
|
|
|
|
|
11-02-2018, 01:36 PM
|
#11
|
|
Senior Member
Join Date: Feb 2013
Posts: 1,120
|
weep
X3 on a small wep hole.
__________________
Hoglou the DH & BK the DW (retired and happy)
WestGA KM4HQQ 146.640mhz
L'IL Foot" 2014 Sunseeker 2300 
"Harry" the JK toad in the mirror
Check out the "mods" in the albums
|
|
|
|
|
03-07-2022, 05:32 PM
|
#12
|
|
Junior Member
Join Date: Apr 2017
Posts: 5
|
Can't find replacement tail light
Can anyone help me find a replacement taillight? Mine was full of water too, but having a hard time finding a replacement to match the other side. Here's the photo...(It's a vertical orientation, not horizontal). 2016 Sunseeker 2650. It has LED's on top and bottom and a bulb in the middle....thanks!
|
|
|
|
|
03-07-2022, 06:07 PM
|
#13
|
|
Certified Curmudgeon
Join Date: Mar 2013
Location: Here
Posts: 3,999
|
Quote:
Originally Posted by uselmce
Can anyone help me find a replacement taillight? Mine was full of water too, but having a hard time finding a replacement to match the other side. Here's the photo...(It's a vertical orientation, not horizontal). 2016 Sunseeker 2650. It has LED's on top and bottom and a bulb in the middle....thanks!
|
Best bet is to contact Command Electronics: https://www.commandelectronics.com/contact
The newer lights are all led and they are sealed. You may end up replacing both.
Here is an example: https://www.etrailer.com/Trailer-Lig...cs/CE44VR.html
You will need to verify size.
While I was here I had the tow truck flip you back on the wheels.
__________________
Mike Dropped
|
|
|
|
|
03-07-2022, 07:28 PM
|
#14
|
|
Senior Member
Join Date: Jun 2020
Posts: 1,361
|
Huh, my 2016 3010 DS had tail lights filling with water on the maiden voyage from New York to Missouri. On the trip home when I noticed it I loosened the screws that hold the tail lights in and the water drained out. Left the screws slightly loose for the rest of the trip. I have the same lights as SS Cruiser. The problem was a terrible job from the factory sealing the light to the body. Cleaned up the messy work, tightened the screws properly, sealed the joints and no more issues.
|
|
|
|
|
03-08-2022, 10:45 AM
|
#15
|
|
Senior Member
Join Date: Oct 2015
Posts: 496
|
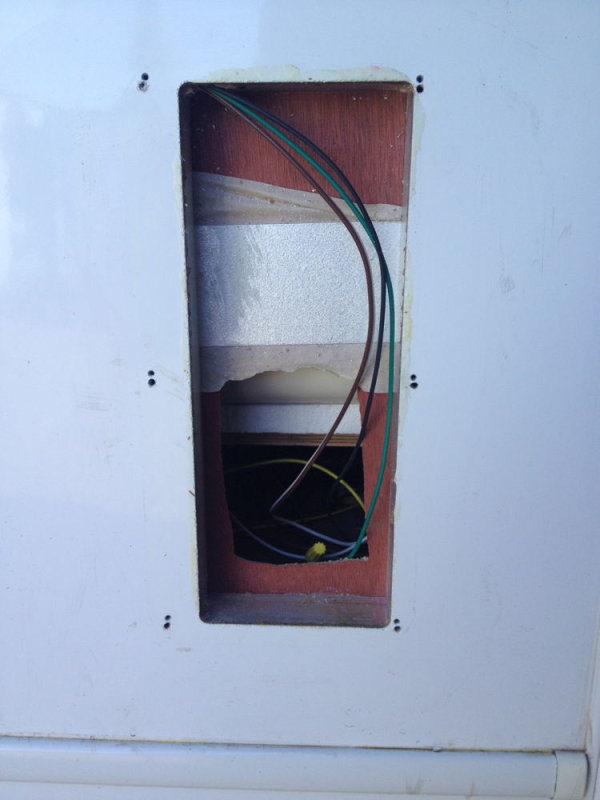
This is probably why you have water in your taillights - same as I had:
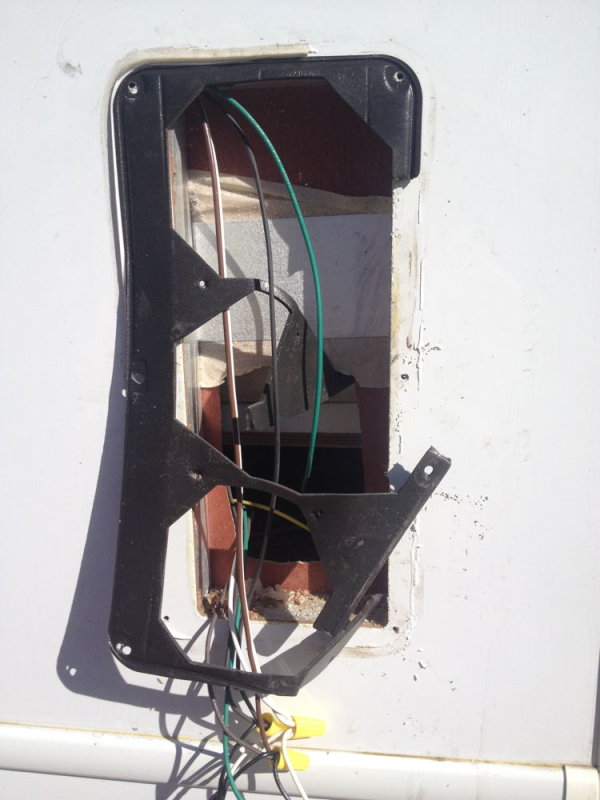
(Ignore the yellow wire nuts - they were temporary until I finished the project, then I used the proper crimp connectors)
It appears they forgot to install the gasket before hooking up the wires, so they tore the gasket, tossed it in the hole, and installed the lamp assemblies.
Mine were full of water not long after we brought it home...
I removed the assemblies, cleaned it all up, then sealed the entire perimeter with clear sealant w/o the gaskets. They've been clean and dry since then.
Drilling holes in the bottom is doing nothing more than hacking at the symptom. As the hole housing the assemblies also opens to the inside, it's an invitation for disaster down the road because you are still permitting/inviting the moisture to invade the space:
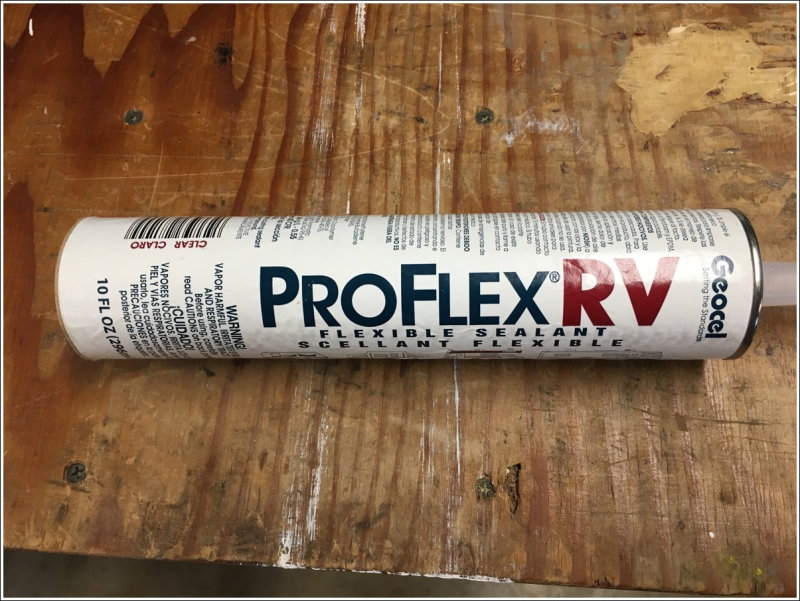
To do it right, remove the assemblies, clean, clean, clean, then use a good quantity of clear sealant around the perimeter and in all screw holes, plus around the perimeter of the clear backup lens.
Results 6+ years later:
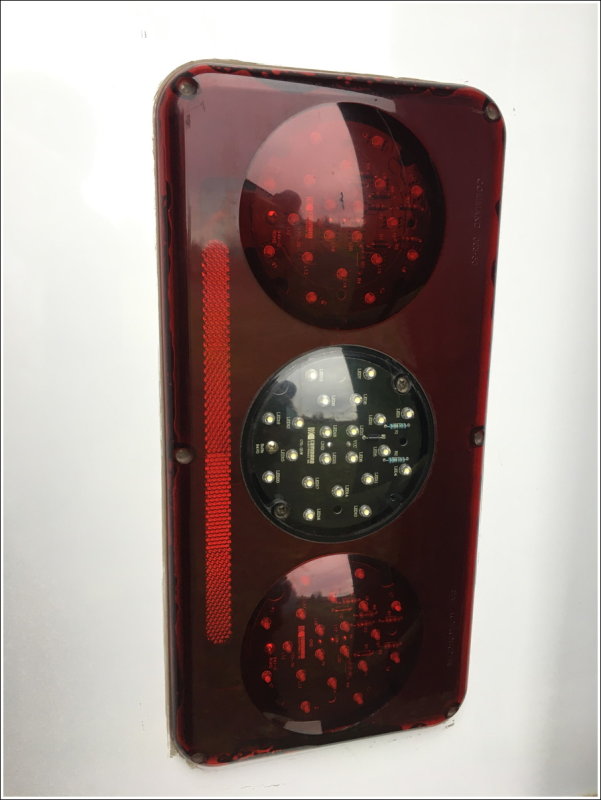
Detail - yes, there's a fair amount of sealant - but NO moisture inside my lenses!
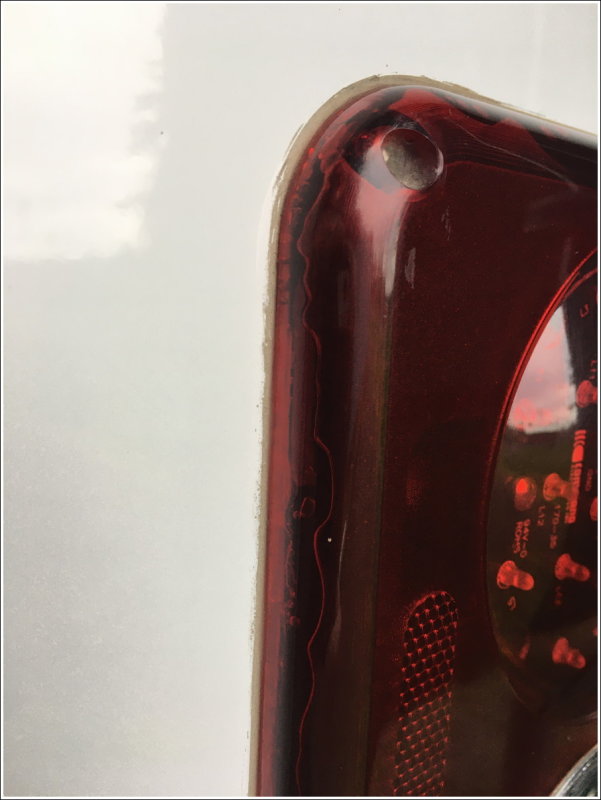
While I used a water based sealant, this is what I'd suggest:
Here's a few more pics of the project: https://pbase.com/brucemac/2015sunseekertaillights
__________________
2016 Sunseeker 2250LE/Chevy
Formerly: 2000 Four Winds 26Q/Ford, '96 Kit Sportsmaster 22' 5th wheel, '91 Sunlite truck camper, Wildernest flip-top canopy
|
|
|
|
|
 Posting Rules
|
You may not post new threads
You may not post replies
You may not post attachments
You may not edit your posts
HTML code is Off
|
|
|
|
 » Recent Discussions
 |
|
|
|
|
|
|
|
|
|
|
|
|
|
|
|
|
|
|
|
|
|
|
|
|
|
|
|
|
|
|
|
|
|


 Linear Mode

