 |
|
 06-26-2017, 05:59 PM
|
#1
|
|
Senior Member
Join Date: May 2016
Posts: 967
|
4SQUARE SafetyStrut installation - 2012 Rockwood Ultra-Lite 2701SS
I received my 4SQUARE SafetyStrut brackets from Mount-n-Lock today.
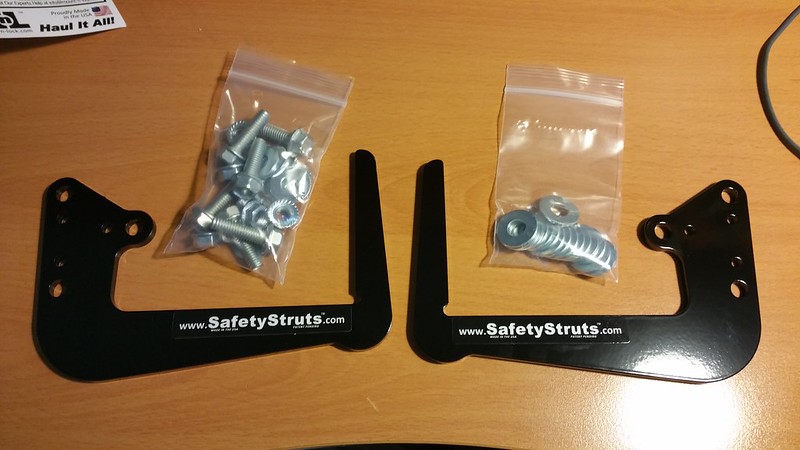
They are designed to reinforce the rear bumper. Our bumper is welded to the supported from the front and bottom by welds to the manufactured I-beam frame.
I suspect that the bumper is already strong enough as is, but the brackets are cheap insurance against loss of whatever we decide to carry back there... and a possible accident if it fell off!
I did some back-and-forth with Paul at Mount-n-Lock for help on choosing the right brackets for my frame. We decided on the SSN with additional washers to space it out from the bottom weld.
__________________
2012 Rockwood Ultra-Lite 2701SS, Goodyear Endurance LRD, ProPride 3P 1400 hitch
2013 F-150 FX4 7700# GVWR SuperCrew 3.5L EcoBoost 157" WB Max Tow 3.73:1
John, Dawn and Emily... and Bella the camping kitty
visit our website at www.restcure.ca
|

|

|
|
06-26-2017, 06:05 PM
|
#2
|
|
Senior Member
Join Date: May 2016
Posts: 967
|
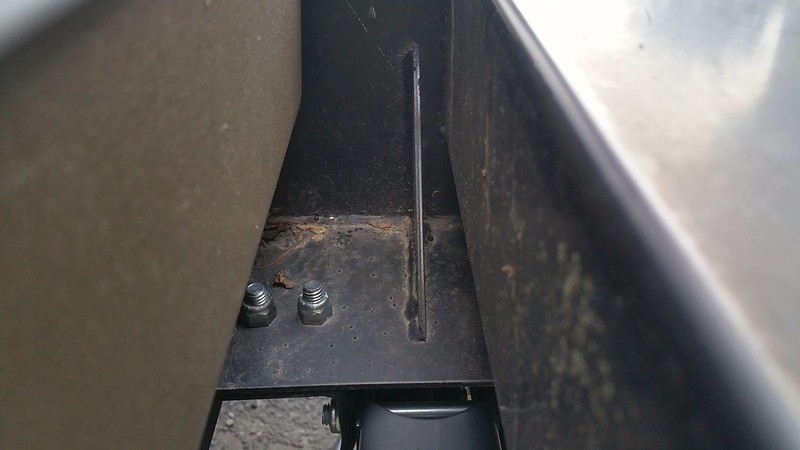
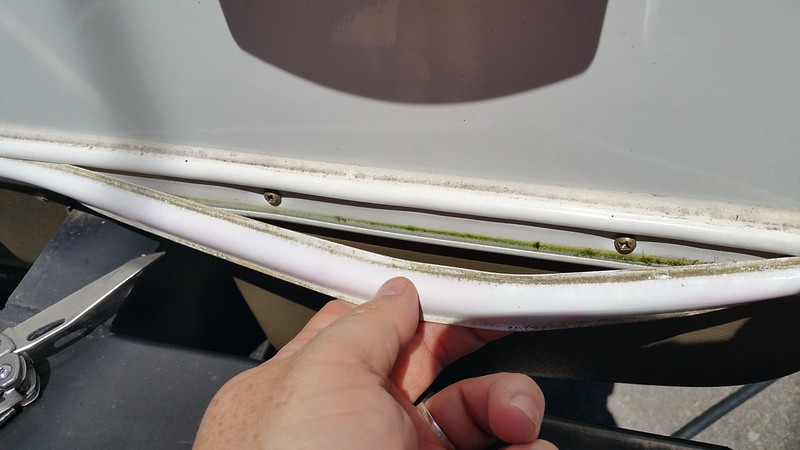
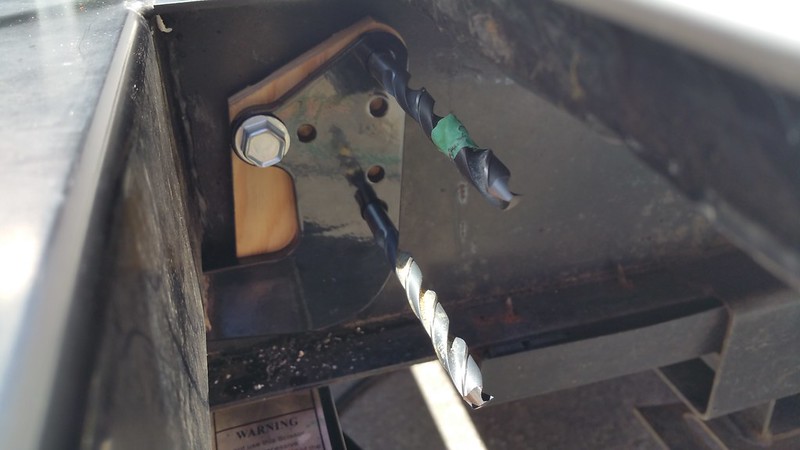
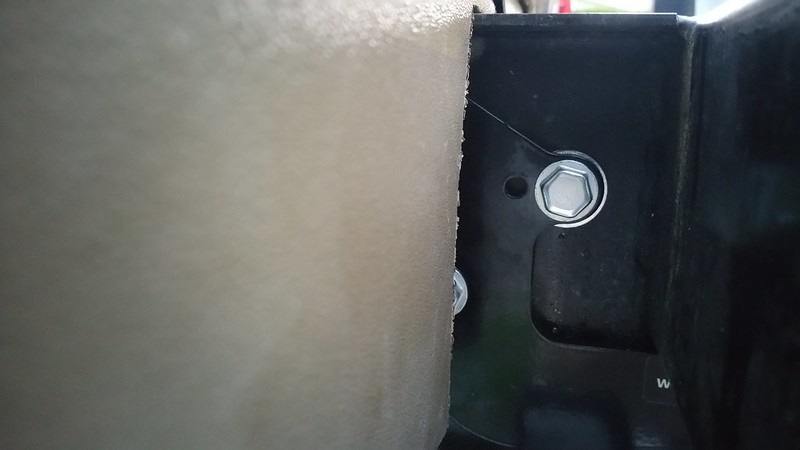
I took the brackets out to the trailer for a first look and noticed right away that this piece of trim is in the way.
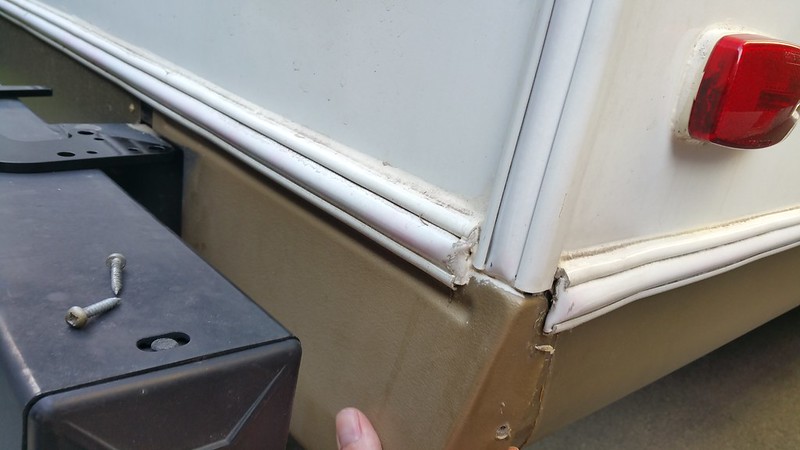

I can bend it forward but not enough to get a straight shot with a drill.
After removing the two screws that secure it to the side trim I was able to move it back a little.
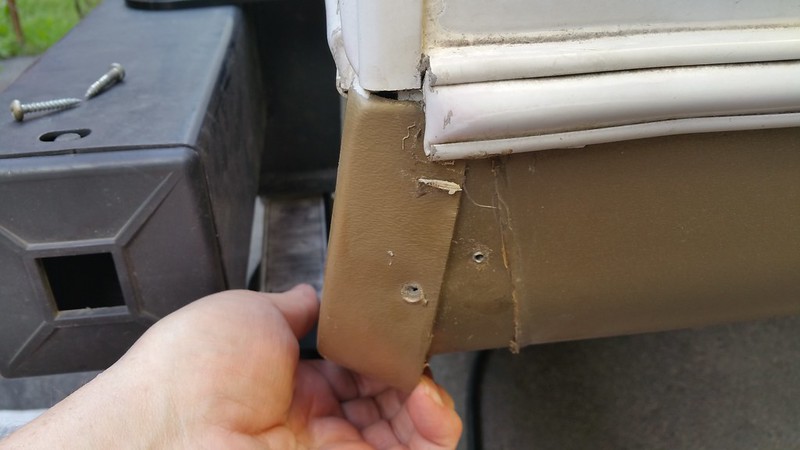
However, it's sealed at the top along the back and won't budge from there.
Any tips on how to remove it?
__________________
2012 Rockwood Ultra-Lite 2701SS, Goodyear Endurance LRD, ProPride 3P 1400 hitch
2013 F-150 FX4 7700# GVWR SuperCrew 3.5L EcoBoost 157" WB Max Tow 3.73:1
John, Dawn and Emily... and Bella the camping kitty
visit our website at www.restcure.ca
|
|
|
|
|
06-27-2017, 08:09 AM
|
#3
|
|
Senior Member
Join Date: May 2017
Posts: 148
|
The convex portion of the trim can be removed to reveal screws that fasten the part on. It will require you removing some of the sealant at the end to gain access to the screw that fastens the trim in place.
__________________
2018 Rockwood Roo 19
2007 Lexus GX470 4.7 V8
|
|
|
|
|
06-27-2017, 08:38 AM
|
#4
|
|
Pickin', Campin', Mason
Join Date: Aug 2015
Location: South Western PA
Posts: 19,146
|
Before I'd be removing trim and caulking, possibly creating a place for a leak... why not simply drill two new holes through the bracket and the frame where you have access?
__________________
2022 Cedar Creek 345IK 5th WheelSolar & Inverter2024 Ford F-Series SCREW7.3L4x4Factory PuckB&W CompanionTST Tire Monitor w/RepeaterSinemate 3500w Gen.
F&AM Lodge 358 Somerset, PA - JAFFA Shrine - Altoona, PA
Days Camped ☼ '19=118 ☼ '20=116 ☼ '21=123 ☼ '22=134 ☼ '23=118☼ '24=90
|
|
|
|
|
06-28-2017, 02:06 PM
|
#5
|
|
Senior Member
Join Date: Mar 2017
Posts: 2,481
|
I'm very interested in finding out how you do with this. I was considering the same setup on my 2008 8318SS. Which has the same style bumper and frame.
Are you going to install a bike rack? I was looking at one of the 4-bike SportWing models
|
|
|
|
|
06-28-2017, 02:33 PM
|
#6
|
|
Senior Member
Join Date: May 2016
Posts: 967
|
Quote:
Originally Posted by jonshonda

The convex portion of the trim can be removed to reveal screws that fasten the part on. It will require you removing some of the sealant at the end to gain access to the screw that fastens the trim in place.
|
Thanks!
Quote:
Originally Posted by 5picker
Before I'd be removing trim and caulking, possibly creating a place for a leak... why not simply drill two new holes through the bracket and the frame where you have access?
|
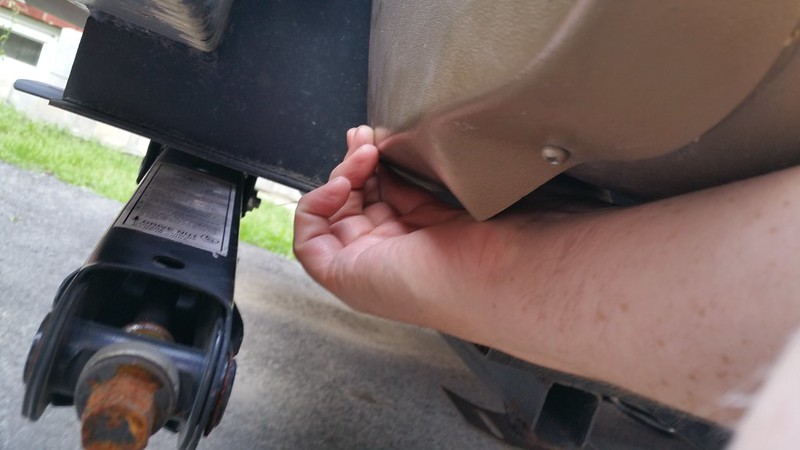
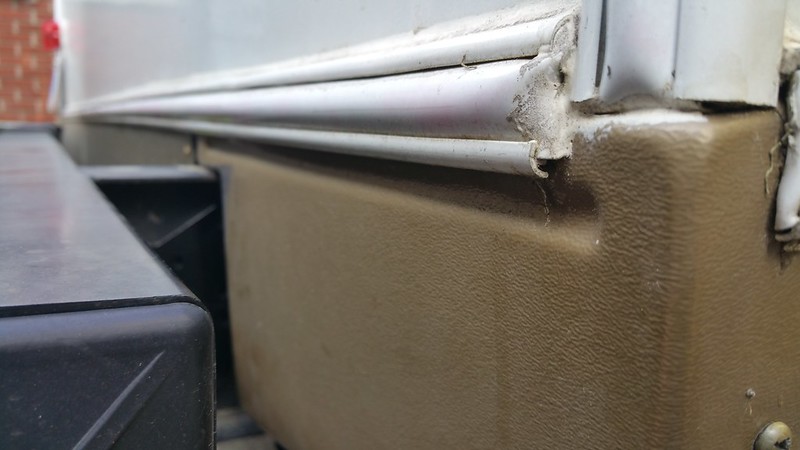
I should have been more clear - the gold stuff is skirting that hangs beneath the trailer and is already exposed to the elements on both sides. I don't think removing it is going to open the door to new leaks, but I will be sure to seal the trim up well. As for new holes, a few reasons:
- The location you suggest is still too tight to get the drill in place
- I think they put the holes where they did on the bracket for most strength (although there is an inner set of holes that can be used instead)
- I already hate drilling through steel and would like to avoid doing more of it than absolutely necessary!
Quote:
Originally Posted by 007matman
I'm very interested in finding out how you do with this. I was considering the same setup on my 2008 8318SS. Which has the same style bumper and frame.
Are you going to install a bike rack? I was looking at one of the 4-bike SportWing models
|
We plan to use our Arvika rack. We've tried it on the A frame (blocks window and battery access):
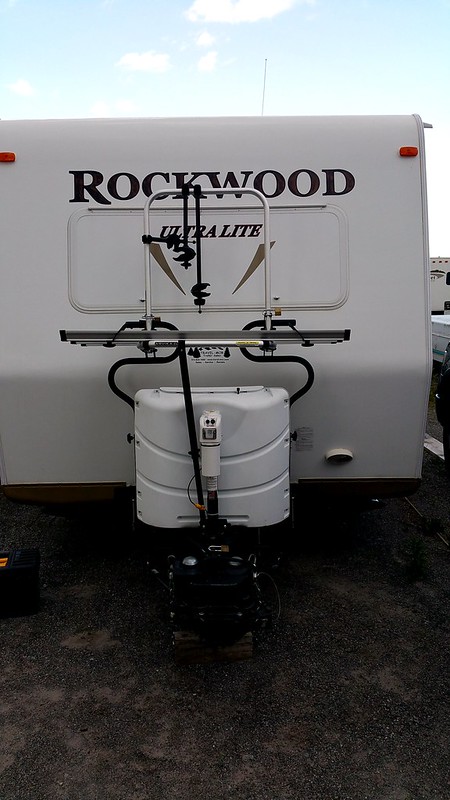
...and we've tried it on the front hitch (sticks out pretty far and obstructs the view a bit):
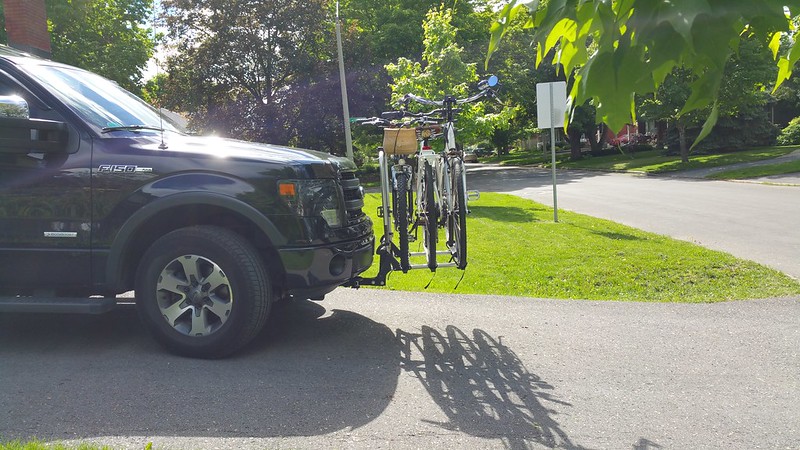
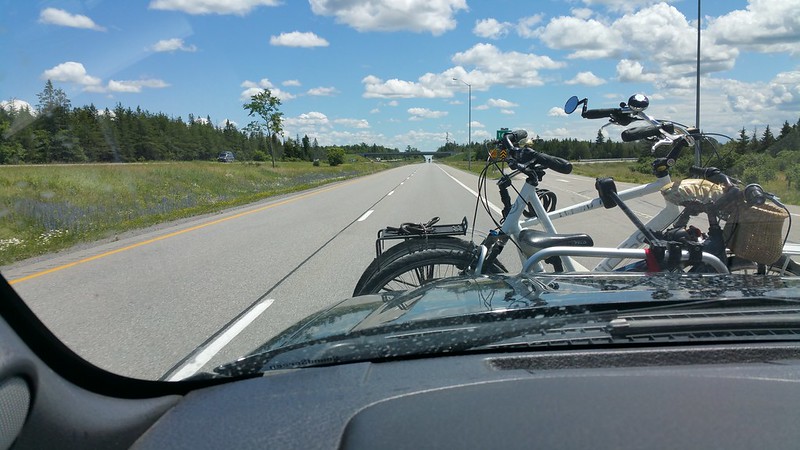
So we're hoping the Arvika works on the rear bumper without too much bounce. If not we will consider improvements to the other methods.
A bigger and higher priority mod is arriving on the FedEx truck this week - but stay tuned!
__________________
2012 Rockwood Ultra-Lite 2701SS, Goodyear Endurance LRD, ProPride 3P 1400 hitch
2013 F-150 FX4 7700# GVWR SuperCrew 3.5L EcoBoost 157" WB Max Tow 3.73:1
John, Dawn and Emily... and Bella the camping kitty
visit our website at www.restcure.ca
|
|
|
|
|
06-28-2017, 03:08 PM
|
#7
|
|
Senior Member
Join Date: Mar 2017
Posts: 2,481
|
I know that some have said that the rear bumper will flex quite a bit but I'm wondering what would happen with those brackets. Additionally, I think I would want to find a way to secure the rack to the back of the trailer to give it some added reinforcement.
|
|
|
|
|
06-28-2017, 03:16 PM
|
#8
|
|
(Dry Huunday)
Join Date: Sep 2014
Location: Eastern North Carolina
Posts: 2,298
|
Quote:
Originally Posted by Restcure
A bigger and higher priority mod is arriving on the FedEx truck this week - but stay tuned!
|
Oh man, teasing us. Now thats just plain mean 
Seriously, nice mod on the bumper ! 
__________________

Beau & Sue
FurKid Express
2015 Coachmen Catalina 303RLS
2016 Chevy Silverado LT 2500HD Duramax
The more people I meet, the more I like my dogs!
|
|
|
|
|
06-29-2017, 05:48 AM
|
#9
|
|
Senior Member
Join Date: May 2016
Posts: 967
|
Quote:
Originally Posted by DreiHunde
|
Patience, Heuschrecke! All will be revealed...
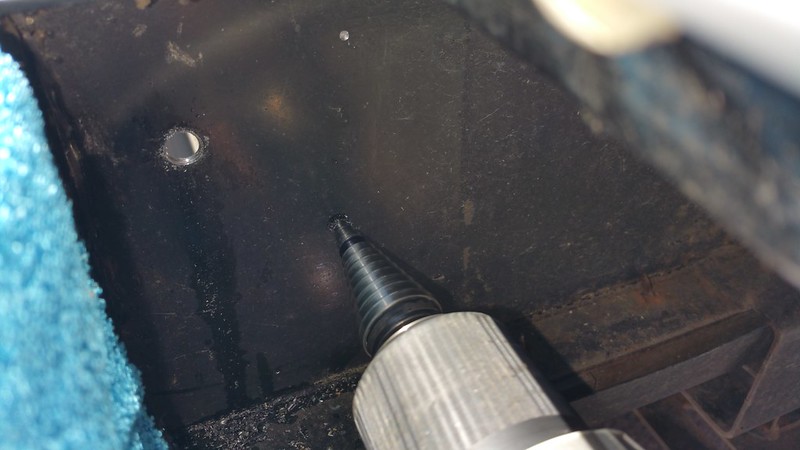
In the meantime Mount-n-Lock support got back to me... one of their suggestions was to try the installation on the INSIDE of the frame. Hmm...
__________________
2012 Rockwood Ultra-Lite 2701SS, Goodyear Endurance LRD, ProPride 3P 1400 hitch
2013 F-150 FX4 7700# GVWR SuperCrew 3.5L EcoBoost 157" WB Max Tow 3.73:1
John, Dawn and Emily... and Bella the camping kitty
visit our website at www.restcure.ca
|
|
|
|
|
06-29-2017, 07:28 AM
|
#10
|
|
(Dry Huunday)
Join Date: Sep 2014
Location: Eastern North Carolina
Posts: 2,298
|
Quote:
Originally Posted by Restcure
Patience, Heuschrecke! All will be revealed...
In the meantime Mount-n-Lock support got back to me... one of their suggestions was to try the installation on the INSIDE of the frame. Hmm...
|
It's always nice when you get feedback from a company! 
__________________
Beau & Sue
FurKid Express
2015 Coachmen Catalina 303RLS
2016 Chevy Silverado LT 2500HD Duramax
The more people I meet, the more I like my dogs!
|
|
|
|
|
06-29-2017, 07:50 AM
|
#11
|
|
Senior Member
Join Date: May 2016
Posts: 967
|
Quote:
Originally Posted by DreiHunde
It's always nice when you get feedback from a company!
|
It is indeed! Unfortunately this particular advice will not work.
__________________
2012 Rockwood Ultra-Lite 2701SS, Goodyear Endurance LRD, ProPride 3P 1400 hitch
2013 F-150 FX4 7700# GVWR SuperCrew 3.5L EcoBoost 157" WB Max Tow 3.73:1
John, Dawn and Emily... and Bella the camping kitty
visit our website at www.restcure.ca
|
|
|
|
|
06-30-2017, 12:58 PM
|
#12
|
|
Senior Member
Join Date: Mar 2017
Location: California
Posts: 179
|
I am just about to order the brackets and cargo tray from mount and go. I have a new 2018 rockwood 2715vs. It has the same small access due to the trim going almost right to the bumper. do you have the dimensions of the portion of the bracket that has the holes that have to be drilled into the I-beam ? Thanks
|
|
|
|
|
06-30-2017, 02:40 PM
|
#13
|
|
Senior Member
Join Date: May 2016
Posts: 967
|
Quote:
Originally Posted by ncebeemer
I am just about to order the brackets and cargo tray from mount and go. I have a new 2018 rockwood 2715vs. It has the same small access due to the trim going almost right to the bumper. do you have the dimensions of the portion of the bracket that has the holes that have to be drilled into the I-beam ? Thanks
|
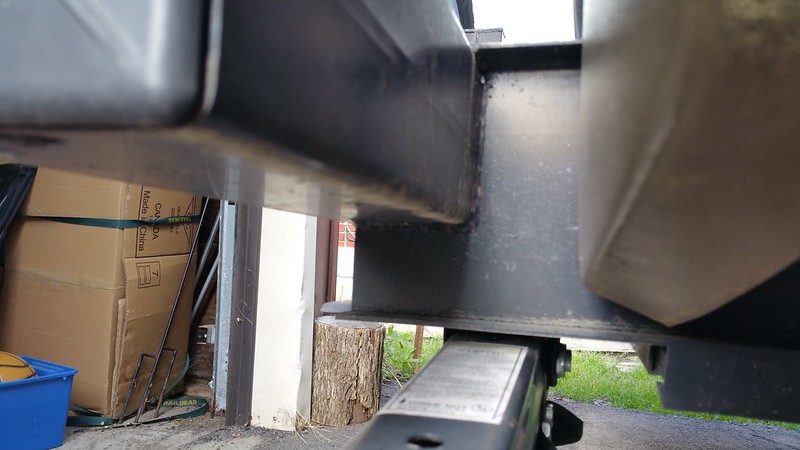
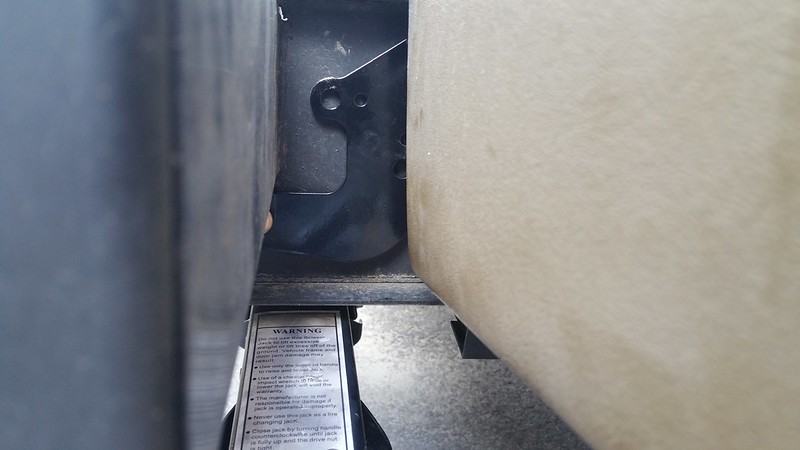
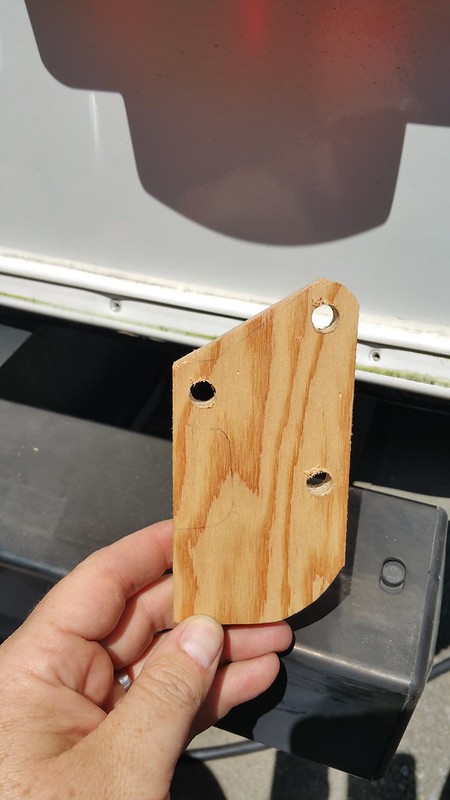
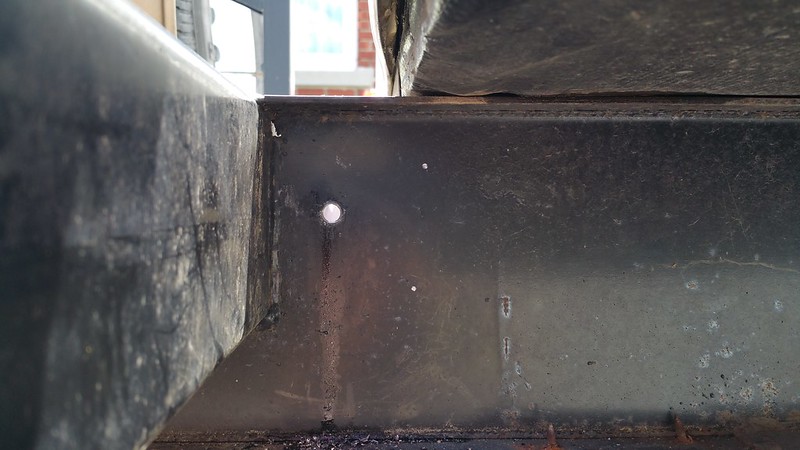
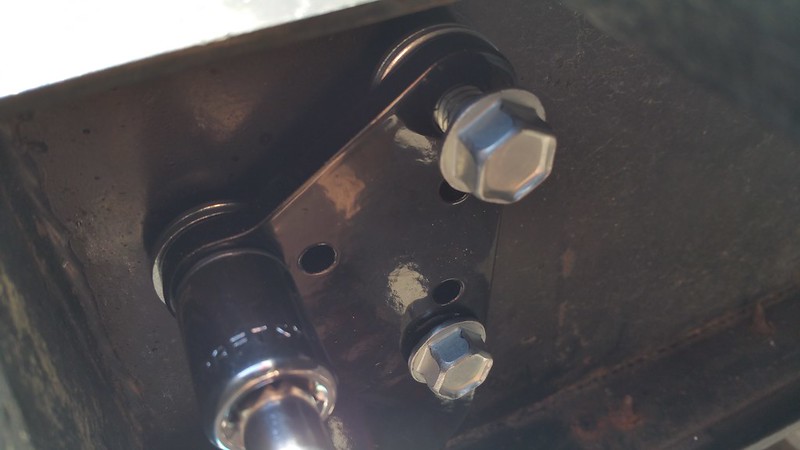
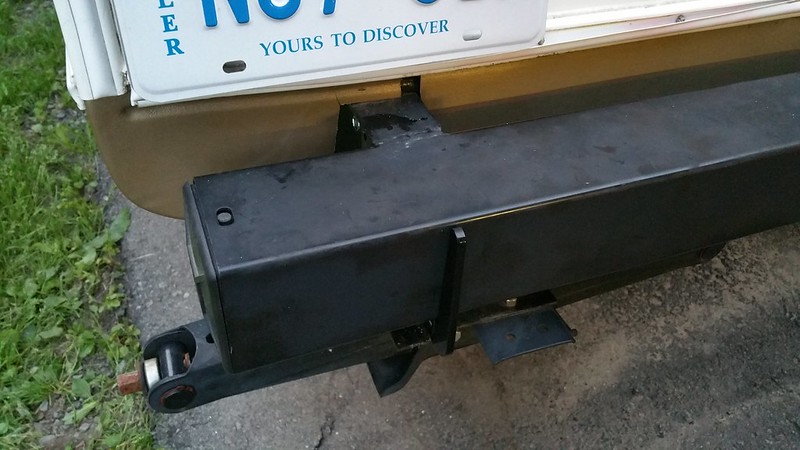
How's this?
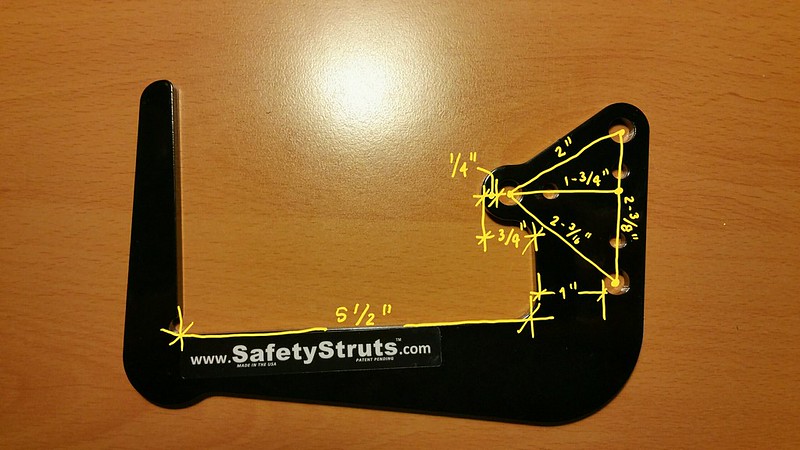
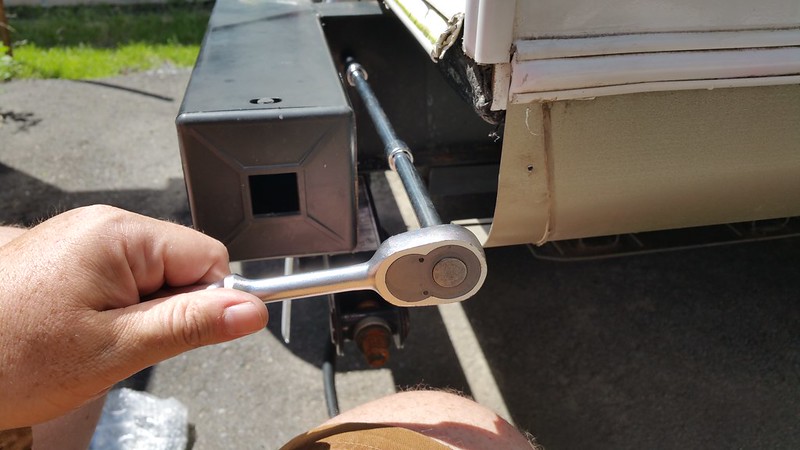
Keep in mind that with 4" bumpers that lug with the forward bolt hole will not be tight against the inside of the bumper (5-1/2" - 3/4" = 4-3/4")... so it sits about 3/4" of an inch away, as you can see in this photo:
__________________
2012 Rockwood Ultra-Lite 2701SS, Goodyear Endurance LRD, ProPride 3P 1400 hitch
2013 F-150 FX4 7700# GVWR SuperCrew 3.5L EcoBoost 157" WB Max Tow 3.73:1
John, Dawn and Emily... and Bella the camping kitty
visit our website at www.restcure.ca
|
|
|
|
|
06-30-2017, 08:39 PM
|
#14
|
|
Senior Member
Join Date: Mar 2017
Location: California
Posts: 179
|
Thanks Restcure.
I took another look at my bumper and saw that they had cut into the I-beam 3.5 inches and rested the bumper (4") on that and then welded. Another site said it should hold 350 lbs. I am going to mount a mount n go generator carrier and carry a Honda 3000 inverter (about 120 lbs). Even though it might be rated for 350 lbs, I still have a concern about the downward rotation weight of the generator as it hangs 24' off of the bumper. I have a call into Forest River to see what they say about it before I decide to add the brackets. I should hear next week when they are back from holiday.
__________________
Chuck& Shar
2018 2715VS
|
|
|
|
|
07-01-2017, 05:51 AM
|
#15
|
|
Senior Member
Join Date: May 2016
Posts: 967
|
ncebeemer, I had the same thoughts when I looked at mine, which is also welded in place under the bumper.

I even started a thread about it... http://www.forestriverforums.com/for...st-136972.html.
My conclusion is that the SafetyStruts are cheap insurance.
__________________
2012 Rockwood Ultra-Lite 2701SS, Goodyear Endurance LRD, ProPride 3P 1400 hitch
2013 F-150 FX4 7700# GVWR SuperCrew 3.5L EcoBoost 157" WB Max Tow 3.73:1
John, Dawn and Emily... and Bella the camping kitty
visit our website at www.restcure.ca
|
|
|
|
|
07-01-2017, 12:24 PM
|
#16
|
|
Senior Member
Join Date: May 2016
Posts: 967
|
Quote:
Originally Posted by DreiHunde
|
Bigger mod complete - new stairs! http://www.forestriverforums.com/for...ml#post1550348
__________________
2012 Rockwood Ultra-Lite 2701SS, Goodyear Endurance LRD, ProPride 3P 1400 hitch
2013 F-150 FX4 7700# GVWR SuperCrew 3.5L EcoBoost 157" WB Max Tow 3.73:1
John, Dawn and Emily... and Bella the camping kitty
visit our website at www.restcure.ca
|
|
|
|
|
07-01-2017, 02:49 PM
|
#17
|
|
Senior Member
Join Date: Mar 2017
Posts: 2,481
|
Quote:
Originally Posted by Restcure
|
Looks great! Congratulations.
|
|
|
|
|
07-05-2017, 09:49 AM
|
#18
|
|
Senior Member
Join Date: May 2016
Posts: 967
|
__________________
2012 Rockwood Ultra-Lite 2701SS, Goodyear Endurance LRD, ProPride 3P 1400 hitch
2013 F-150 FX4 7700# GVWR SuperCrew 3.5L EcoBoost 157" WB Max Tow 3.73:1
John, Dawn and Emily... and Bella the camping kitty
visit our website at www.restcure.ca
|
|
|
|
|
07-05-2017, 10:06 AM
|
#19
|
|
Senior Member
Join Date: May 2016
Posts: 967
|
__________________
2012 Rockwood Ultra-Lite 2701SS, Goodyear Endurance LRD, ProPride 3P 1400 hitch
2013 F-150 FX4 7700# GVWR SuperCrew 3.5L EcoBoost 157" WB Max Tow 3.73:1
John, Dawn and Emily... and Bella the camping kitty
visit our website at www.restcure.ca
|
|
|
|
|
07-05-2017, 10:07 AM
|
#20
|
|
Senior Member
Join Date: Jun 2012
Posts: 10,907
|
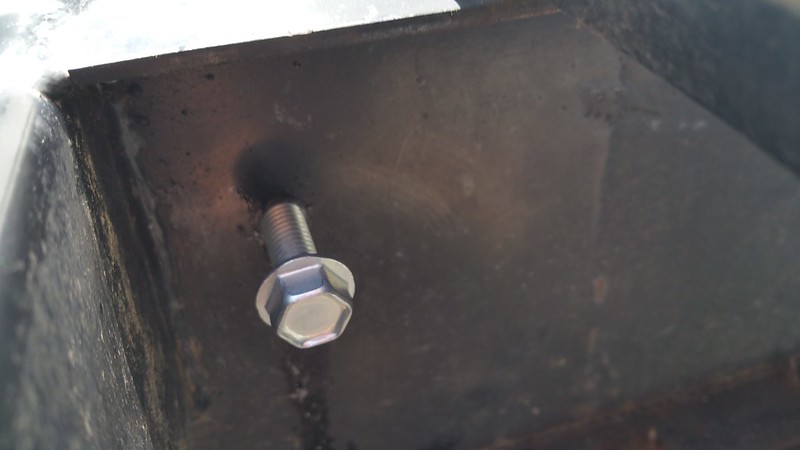
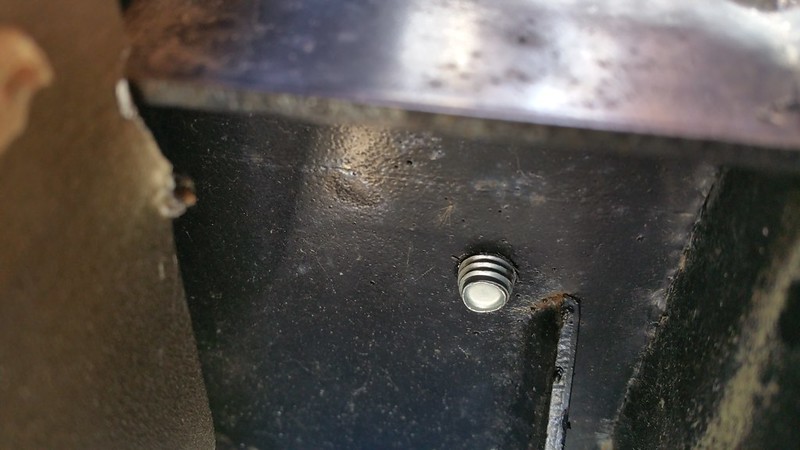
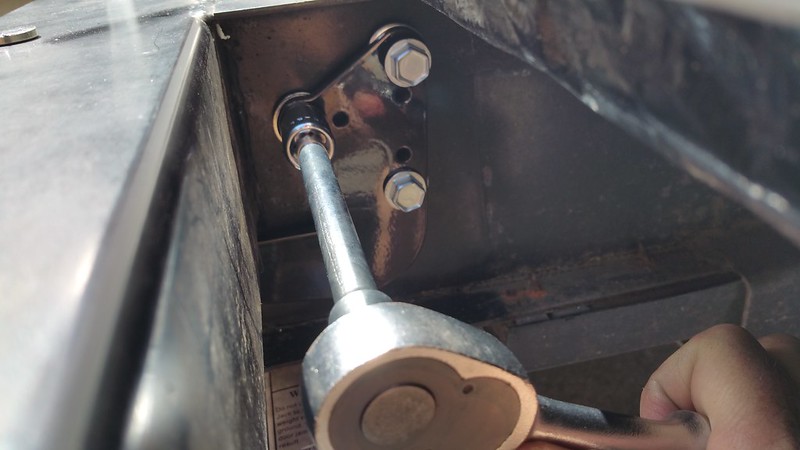
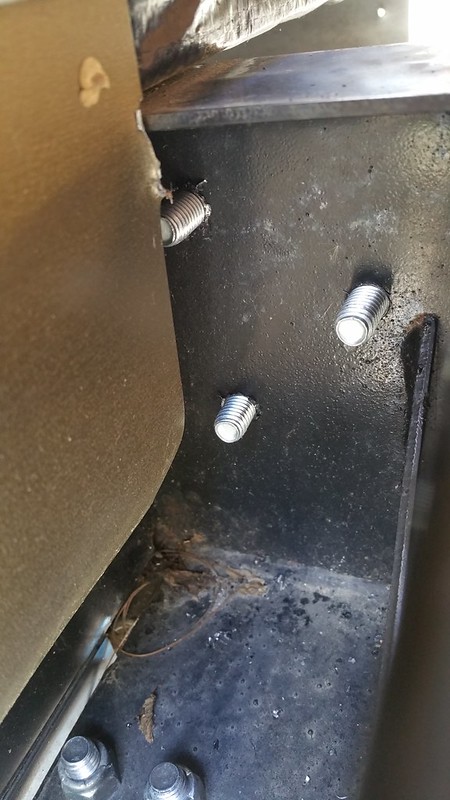
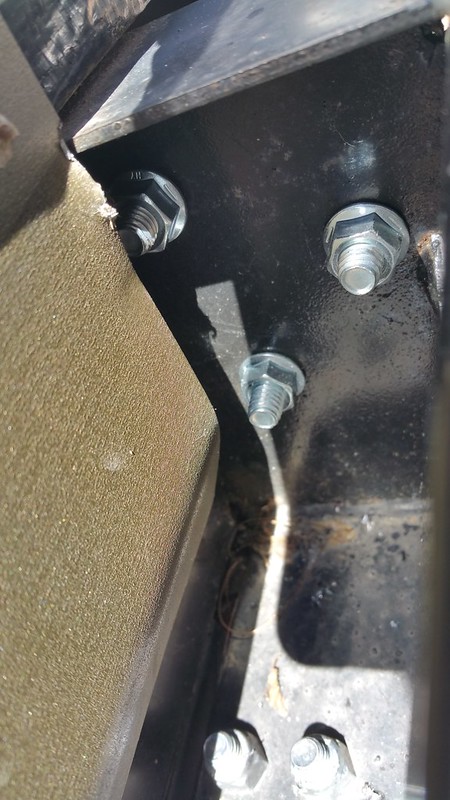
There shouldn't be any real force pulling outward on the bolts, but I don't know that I'd trust self-tapping bolts on that relatively thin web. If it were me, I'd replace them with real bolts, nuts and lock washers. Just for my own peace of mind.
UPDATE: Glad to see you added nuts. Looks like I posted too soon!
__________________
1988 Coleman Sequoia - popup (1987-2009) - outlasted 3 Dodge Grand Caravans!
2012 Roo19 - hybrid (2012-2015)
2016 Mini Lite 2503S - tt (2015 - ???)
2011 Traverse LT, 3.6L, FWD
2009 Silverado 1500 Ext Cab, 5.3L, 4x4, 3.73
2016 Silverado 2500HD Dbl Cab, 6.0L 4x4, 4.10
|
|
|
|
|
|
 Posting Rules
|
You may not post new threads
You may not post replies
You may not post attachments
You may not edit your posts
HTML code is Off
|
|
|
|
 » Recent Discussions
 |
|
|
|
|
|
|
|
|
|
|
|
|
|
|
|
|
|
|
|
|
|
|
|
|
|
|
|
|
|
|
|
|
|


 Linear Mode

