 |
|
 07-23-2015, 12:12 PM
|
#1
|
|
Who Dares, Wins
Join Date: May 2012
Location: Chester County, PA
Posts: 7,063
|
Did the Sewer Fence Post Holder
I have beating around the bush for some time to do the fence post holder for our sewer. So finally had some time off and put it all together yesterday.

Overall I am very happy with how it turned out. I will leave it as is and if the white bothers me I'll paint it black to match the trailer. I mounted it just forward of the midship jacks to allow for access to the jacks. I did not put it to the rear since the tanks are there and I did not want to risk dragging it.
I was able to get all that I needed, including the fence post, at Lowes. The cost was just under $70 for everything. I was going back and forth on how to mount it and make the access doors. Stole a few ideas from other and put it all together..
Here is a copy of the receipt from the Lowes. It has all that I bought for this setup. Only two things were different and I will get to those..
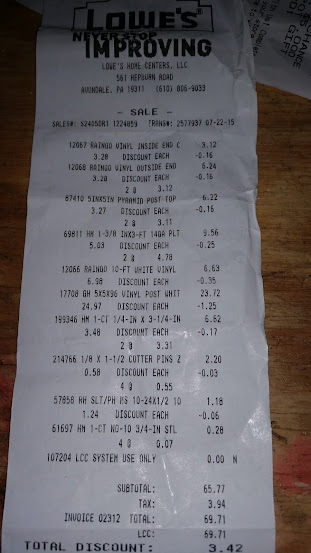
Bought the 8ft 5x5 fence post and 4.5" gutter in a 10ft length. Made the brackets out of some 1 1/2" plate steel with holes pressed into them. Used my vise to make them. It actually was easier than I thought it would be considering I had only a hammer and the shop vise. Just took some patience.


I decided the leave the fence post uncut at the 8ft length. I would be just as wide as the trailer (It will stick out a bit with the caps on). I just cheated it to the driver's side a hair so it is slightly out on the driver's side to avoid the side of the road. The brackets were held up into the frame's lip using a few self-tapping screws.
The lid design I stole from someone who had done it before me. I Used the standard caps, two springs and four cotter pins per door. Used 3 1/4" x 1/4" springs and 1/8" x 1 1/2" cotter pins. As you'll see in the photos I initially mounted everything centered up.. But when the gutter was slid into the post the would get hung up on the cotter pins. So I moved them up to be above the gutter.


__________________

Pat, Jen, Heather & Sapphire, the head mouser.
2015 Chevy HD D-Max
2022 Impression 315MB
|

|

|
|
07-23-2015, 12:13 PM
|
#2
|
|
Who Dares, Wins
Join Date: May 2012
Location: Chester County, PA
Posts: 7,063
|
Continued...
Once they were all drilled and bent it allowed me to keep the door closed but easily flip it out of the way to access the hoes. I did this on both sides of the trailer. The cap is tightly fitting but not so hard as to strain the springs. In the first picture you can also see a screw was added with a lock washer to keep the post from sliding side to side. It was a tight fit with the brackets but it is a safety, if you will.


Gutter clearing the lid mounts. You can see the original holes that got bound up.

Now the part that is different in the receipt from above. I originally bought two outside caps and one inside cap:
INSIDE CAP:

OUTSIDE CAP:
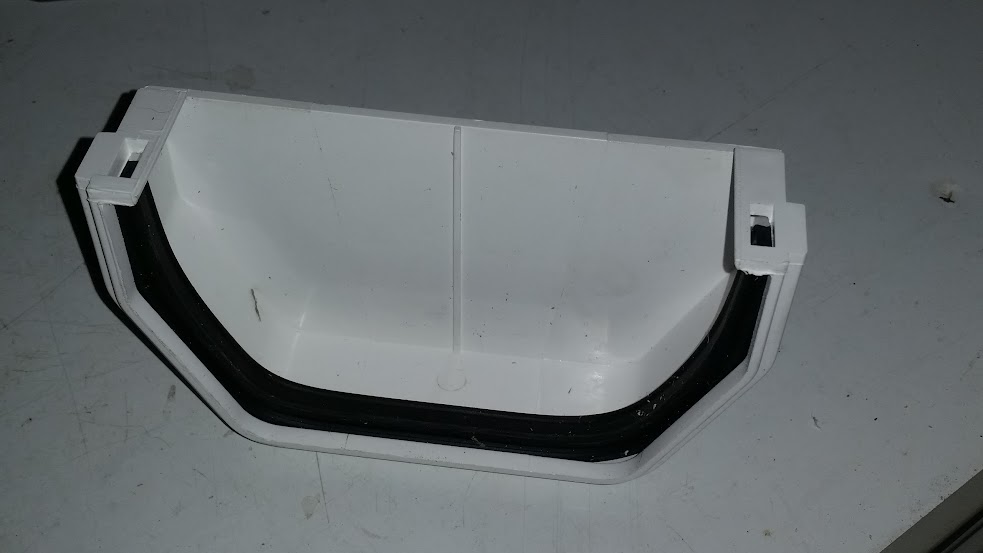
As it sounds, the OUTSIDE caps are for the end of a gutter. As you can see they have a nice rubber seal to made the ends waterproof. BUT, because of the seal and how they mounted (outside the gutter) they would not fit into the fence post once a fixed, they were a 1/4" to fat.
The INSIDE caps mounted inside the gutter not making it any wider. These did not have a waterproof seal and did not snap into place like the end caps. I solved this issue with some pop rivets (so as not to add width to the gutter) and some silicone sealant to keep the bad stuff in the tub. I added a third cap to keep the threaded part of the hose in place as well.

So after a couple hours of work and a few glasses of iced tea all worked out well. The gutter easily slides out both sides and everything fits nicely and neatly. Even without the screws I added as safeties the thing is rock solid in its mounts. I have a Rhino Flex 15ft hose with the threaded 90 campground hook up and a Rhino Flex 10ft extension hose packed in the gutter. With all this in the gutter I have about 1 or 2 inches to spare.
Link to all the photos:
https://plus.google.com/photos/10538...39945882513169
__________________
Pat, Jen, Heather & Sapphire, the head mouser.
2015 Chevy HD D-Max
2022 Impression 315MB
|
|
|
|
|
07-23-2015, 03:44 PM
|
#3
|
|
Senior Member
Join Date: Jun 2015
Posts: 213
|
Slick!
__________________
Certified JB Welder. Certified 3M Duct Tape installer.
Certified Farmer's Co-Op bailing wire expert. Graduate of the "Rock on the side of the Trail as a Hammer" school of motorcycle repair.
Getting old is just a matter of narrowly missing all the things that kill you.
|
|
|
|
|
07-23-2015, 03:58 PM
|
#4
|
|
Senior Member
Join Date: Dec 2010
Location: Texas - east of San Antonio
Posts: 305
|
Very, very nice!!! 
__________________

2005 Dodge Ram 2500, 4x4
2017 Heritage Glen QBUD312
|
|
|
|
|
07-23-2015, 04:16 PM
|
#5
|
|
Senior Member
Join Date: Dec 2013
Posts: 142
|
Very good. I will get around to this one day. for now my sterlite container will have to do.
__________________
2015 Palomino Puma Unleashed 351-THSS 37' Toyhauler
2016 F-350 Platinum DRW 4x4 w/ Curt Q24 hitch and Air Lift rear air ride
"Just put that hammer down and give it hell" -Jerry Reed
|
|
|
|
|
07-23-2015, 05:32 PM
|
#6
|
|
Member
Join Date: Jun 2015
Location: Alberta St Albert
Posts: 47
|
Nice job!
|
|
|
|
|
07-24-2015, 08:21 AM
|
#7
|
|
Senior Member
Join Date: Jan 2015
Location: eastern NC
Posts: 1,783
|
nice job, I like the spring loaded end caps and how you used the cotter pins to keep the inside protrusion to a minimum
|
|
|
|
|
07-24-2015, 01:48 PM
|
#8
|
|
Senior Member
Join Date: May 2012
Location: Summer in Ontario, Winter Texans
Posts: 110
|
Very nice, and neat. Just what I needed to get my project complete. AND, Thanks for the pictures that puts it all together.
|
|
|
|
|
07-24-2015, 02:09 PM
|
#9
|
|
Senior Member
Join Date: Mar 2015
Location: North Idaho
Posts: 104
|
Thank you! I have been wondering where / how to do the same thing on our Wildcat. We too use the Rhino hose and it won't fit in the tail tube storage and I didn't want to mount something under the tail where it could get crushed if I was unlucky enough to get that steep driveway with the trailer. You install solved a bunch of questions for me. Again, THANKS!
|
|
|
|
|
07-24-2015, 09:06 PM
|
#10
|
|
Who Dares, Wins
Join Date: May 2012
Location: Chester County, PA
Posts: 7,063
|
We also have a steep driveway. I do not need an axle flip but I am close for sure... Thank you all for the kind words. Glad I can help some of you all out.
Sent from my SAMSUNG-SM-G870A using Tapatalk
__________________
Pat, Jen, Heather & Sapphire, the head mouser.
2015 Chevy HD D-Max
2022 Impression 315MB
|
|
|
|
|
07-25-2015, 08:25 AM
|
#11
|
|
Senior Member
Join Date: Jun 2013
Location: WEST LEBANON, NH
Posts: 260
|
You know what makes this an excellent project? Best I've seen in a long time. It's the pictures and explanation of the complete project. I did this to my Lexington 300 before trading it, I had one for sewage hoses and another beside it for my fishing poles. Much easier project than most think and we'll worth it. Again congratulations on a job well done.
__________________
Bruce & Nancy Richardson

Lexington GTS 300 S/S
Chevy Avalanche
Jeep Wrangler
Honda Goldwing
|
|
|
|
|
07-25-2015, 08:33 AM
|
#12
|
|
Senior Member
Join Date: Jul 2014
Location: MA
Posts: 1,830
|
Awesome job and great job posting all the photo's. People are going to find this very informative and helpful. I am sure it will be cited by others for many years to come.
Vin.
__________________

2015 HW296
2006 HW256 (previous pup)
2013 Chevy Tahoe
Equalizer WDH 10000#
|
|
|
|
|
07-25-2015, 12:03 PM
|
#13
|
|
Senior Member
Join Date: Mar 2011
Location: Auburn, GA
Posts: 966
|
I have done this mod to both my 5er and my TT toy hauler for deer hunting. One of the most useful mods out there. Good job!
__________________
2012 Sandpiper 365SAQ weighing @ 15k, Onan, 2nd air, slide toppers, TST
2013 F350 6.7L Lariat 4x4 CC DRW,Viair 1007, Ride-Rites, Edge CTS, B&W
2001 Chevy 3500CC DRW 4x4, 8.1L, 4.10 gears w/ Detroit TrueTrac
2001 Ford Excursion Limited 4x4 7.3L,V/B Spring Mod, ProComps, Hellwig Swaybar, & other 'Necessities'
|
|
|
|
|
09-15-2015, 09:56 AM
|
#14
|
|
Senior Member
Join Date: Jul 2015
Location: Central Florida
Posts: 454
|
Planning on going to go to the store today or tomorrow to get the parts for this mod.
Thanks for the info and pictures. Should hopefully help me to avoid (the usual) repeated trips to the store (I always forget something).
Did you use self-tappers to mount the brackets to the frame, or did you use bolts with locking nuts ?
__________________
2015 Rockwood Signature UltraLite 8281WS
2016 Ford F-250 Lariat CrewCab, 4x4, 6.2L V8
|
|
|
|
|
09-15-2015, 10:28 AM
|
#15
|
|
Senior Member
Join Date: Aug 2015
Location: South West Michigan
Posts: 187
|
Great idea and a great installation. The pictures sure make it look easy. Might have to try this one of these days.
__________________
2015 Flagstaff 8528IKWS Diamond Package
2013 Ford F-150 Super Crew, EcoBoost, Max Tow,
6.5 bed, Roadmaster Active Suspension, E rated tires
98 days camping 2017 98 days camping 2018
94 days camping 2019 49 days camping 2020
|
|
|
|
|
09-15-2015, 11:06 AM
|
#16
|
|
Senior Member
Join Date: Mar 2011
Location: Auburn, GA
Posts: 966
|
I used bolts with nylon lock nuts on both of mine.
__________________
2012 Sandpiper 365SAQ weighing @ 15k, Onan, 2nd air, slide toppers, TST
2013 F350 6.7L Lariat 4x4 CC DRW,Viair 1007, Ride-Rites, Edge CTS, B&W
2001 Chevy 3500CC DRW 4x4, 8.1L, 4.10 gears w/ Detroit TrueTrac
2001 Ford Excursion Limited 4x4 7.3L,V/B Spring Mod, ProComps, Hellwig Swaybar, & other 'Necessities'
|
|
|
|
|
09-15-2015, 07:09 PM
|
#17
|
|
Senior Member
Join Date: Jun 2013
Posts: 171
|
Just did mine yesterday. The drawer can double as a support for the hose on uneven ground.
|
|
|
|
|
09-15-2015, 08:17 PM
|
#18
|
|
Who Dares, Wins
Join Date: May 2012
Location: Chester County, PA
Posts: 7,063
|
Quote:
Originally Posted by leefl

Planning on going to go to the store today or tomorrow to get the parts for this mod.
Thanks for the info and pictures. Should hopefully help me to avoid (the usual) repeated trips to the store (I always forget something).
Did you use self-tappers to mount the brackets to the frame, or did you use bolts with locking nuts ?
|
I used sell tapers, but that was just because I had them in the garage.
__________________
Pat, Jen, Heather & Sapphire, the head mouser.
2015 Chevy HD D-Max
2022 Impression 315MB
|
|
|
|
|
09-15-2015, 08:28 PM
|
#19
|
|
Plain Old Member
Join Date: Nov 2012
Location: Full Timing in South Louisiana
Posts: 1,938
|
I've been wanting to do this for a long time. Actually over the last 3 rigs we've owned, and STILL have not done it. Problem is, nobody carries the posts. Not lowes or HD, at least within a 2 hour range of me. Looks like I'll just have to order them at some point and make it happen. Unless somebody knows somebody that carries the 5" post in central Louisiana?
__________________
John and Rebecca Dickson
Emma-7 / Little John-5 / Iva-1
Full Timing Again, Rev B
2013 Ford F-350 Lariat CC LB PSD
2015 SOB TT - With OC's Awning Poles (#8)
At least in Heaven, RVs will be perfect, and I won't have to keep fixing them.
|
|
|
|
|
09-15-2015, 08:28 PM
|
#20
|
|
Senior Member
Join Date: Jun 2012
Posts: 10,907
|
Great job.
Mine was white until I moved it from my white Roo 19 to my whatever-color-the-emerald-package-Mini-Lite-2503S is. That's when the DW said it needed to be painted to match the black along the bottom of the trailer. Really makes it "disappear." See 1st pic below.
Also, I held mine with bungee cords, so I have a small U-bolt in the middle of the end caps. See 2nd pic below. Although you don't need them with your spring setup, you might want to add them, or something like them (even a kitchen cabinet knob) so you can grab and open them easier. I'm guessing it takes both hands with your setup. A knob would make it a one-hander.
__________________
1988 Coleman Sequoia - popup (1987-2009) - outlasted 3 Dodge Grand Caravans!
2012 Roo19 - hybrid (2012-2015)
2016 Mini Lite 2503S - tt (2015 - ???)
2011 Traverse LT, 3.6L, FWD
2009 Silverado 1500 Ext Cab, 5.3L, 4x4, 3.73
2016 Silverado 2500HD Dbl Cab, 6.0L 4x4, 4.10
|
|
|
|
|
|
| Thread Tools |
|
|
| Display Modes |
 Linear Mode Linear Mode
|
 Posting Rules
|
You may not post new threads
You may not post replies
You may not post attachments
You may not edit your posts
HTML code is Off
|
|
|
|
 » Recent Discussions
 |
|
|
|
|
|
|
|
|
|
|
|
|
|
|
|
|
|
|
|
|
|
|
|
|
|
|
|
|
|
|
|
|
|


