 |
|
 08-30-2013, 03:43 PM
|
#1
|
|
Moderator Emeritus
Join Date: Apr 2013
Posts: 5,173
|
Finally Modded!
Well, after having the TT for several months, and itching to do some mods, the DW finally broke down and let me get started. So, before she objected again I packed as many into the couple last few weeks as I could.
Mod #1) Changed all kid reachable lights to LEDs:
The kids were constantly turn on their bunk lights and then leaving them on. I've been concerned that they could burn themselves on those lights when they get hot so I swapped them out to LEDs. Picked up this set from amazon and replaced the lights in their bunks. They're not as bright as the incandesents, but still pretty bright.
 
Mod #2) Installed MaxAir Covers
I covered this in my other thread "Did I install my MaxAir wrong?". Added two vent covers for the front and reat bedrooms.
 
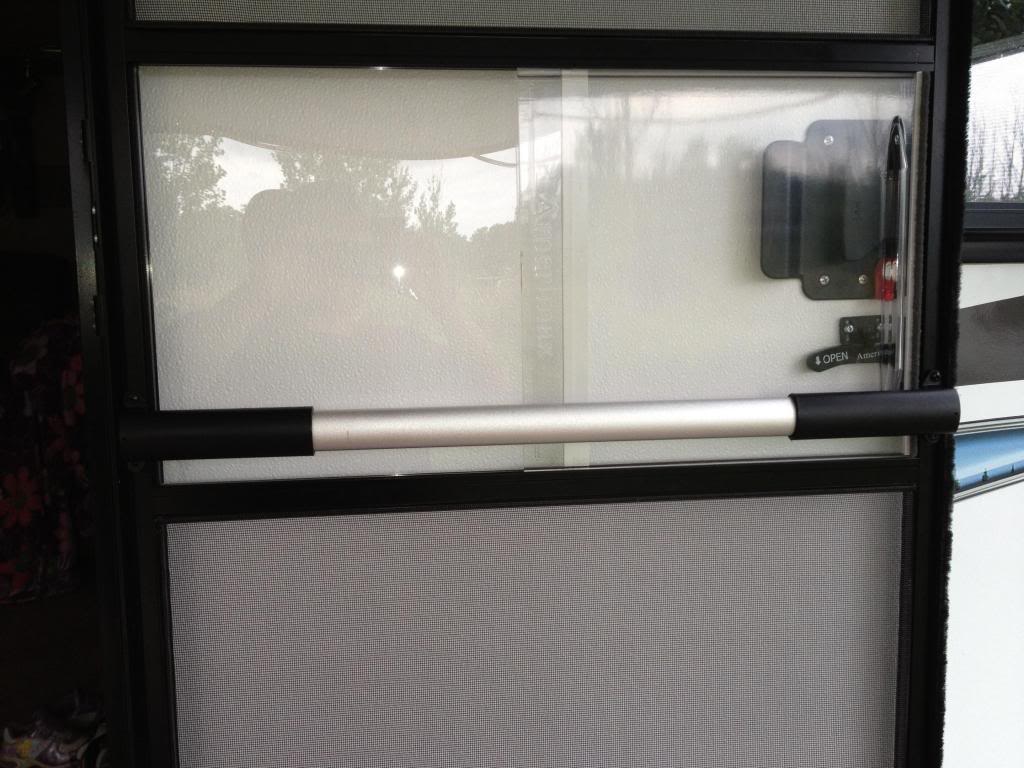
Mod #3) Installed Screen door handle
Got tired of the kids always pulling on the screen, so I added a handle. Picked this up at the local RV dealer.
Mod #4) Installed a tongue level
Not a big mod, but I wanted something to help guage my tongue height before checking the other levels around the trailer.

Mod #5) Installed a shop towel holder
Again, not a big mod.

|

|

|
|
08-30-2013, 03:43 PM
|
#2
|
|
Moderator Emeritus
Join Date: Apr 2013
Posts: 5,173
|
Continued:
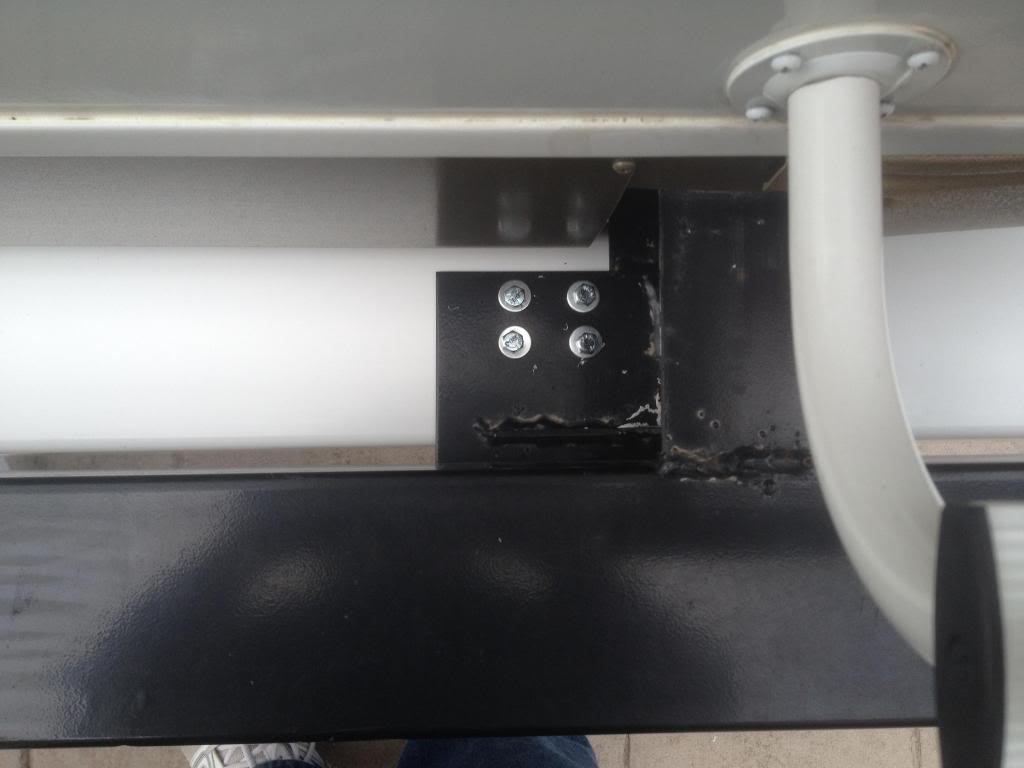
Mod #6) Built a new sidekick table
If anybodies ever left their table hanging on the side of the trailer during a rain storm, you'd realise that laminate covered pressboard doesn't hold up to getting wet:
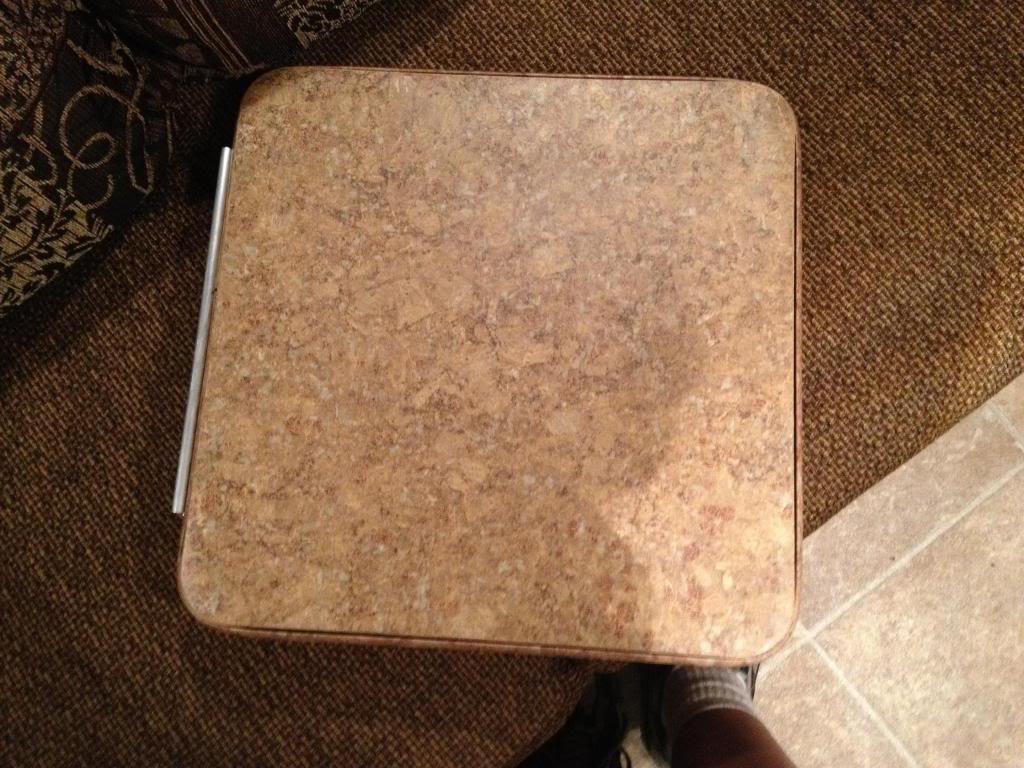
So, since I had to build a new table anyways, I thought I'd deal with the height difference and a few other things at the same time. Built the new table to drop down to the same height as the grill, and included a place to store the BBQ tools.
 
Mod #7) Installed a marker light switch
While talking to a camping buddy, he was telling me about how you can get the marker lights on by putting a jumper between pins #3 and #4 of your 7 pin. The first time I saw him do it I liked the look, but I also knew we could improve on the design. Instead of just jaming a paper clip in, like he did, we got a 7 pin harness, a switch, a fuse and a waterproof box. Now, I can control whether or not to turn them on, based on the CG I'm in, and it keeps my 7 pin up off the ground and not getting full of dirt/water/etc...
 
|
|
|
|
|
08-31-2013, 08:33 AM
|
#3
|
|
Member
Join Date: Aug 2013
Location: Louisiana
Posts: 58
|
Where exactly do u have that shop towel holder?
__________________
2014 Rockwood 2703 WS
2014 Chevy Silverado 1/2 ton
|
|
|
|
|
09-01-2013, 09:09 AM
|
#4
|
|
Moderator Emeritus
Join Date: Apr 2013
Posts: 5,173
|
It's in the pass-through storage. Quite handy to have around to clean up messes, kids, etc...
__________________
There's no use crying over spilt milk... unless it's on your keyboard.
|
|
|
|
|
09-02-2013, 08:54 AM
|
#5
|
|
Senior Member
Join Date: Feb 2012
Location: Wisconsin
Posts: 13,732
|
Nice job on your mods!
|
|
|
|
|
09-02-2013, 11:21 AM
|
#6
|
|
Senior Member
Join Date: Mar 2011
Location: Auburn, GA
Posts: 966
|
Very nice!! Modding is a disease...and I'm sick! 
__________________
2012 Sandpiper 365SAQ weighing @ 15k, Onan, 2nd air, slide toppers, TST
2013 F350 6.7L Lariat 4x4 CC DRW,Viair 1007, Ride-Rites, Edge CTS, B&W
2001 Chevy 3500CC DRW 4x4, 8.1L, 4.10 gears w/ Detroit TrueTrac
2001 Ford Excursion Limited 4x4 7.3L,V/B Spring Mod, ProComps, Hellwig Swaybar, & other 'Necessities'
|
|
|
|
|
09-02-2013, 12:27 PM
|
#7
|
|
Member
Join Date: Feb 2013
Location: South Georgia
Posts: 80
|
I saw a mod this weekend that I am itching to do! Some folks camping near us had removed the screen from their screen door and replaced it with plexiglass! Looks like a storm door and really want to convert one of my screen doors like that! It looked really good and I think it would work out great for us!
|
|
|
|
|
04-17-2014, 04:20 PM
|
#8
|
|
Moderator Emeritus
Join Date: Apr 2013
Posts: 5,173
|
Well, I finally got some more mods done, so it's time to revive my old thread.
First was the famous fence post for sewer hose mod:

I mounted it by bolting thru some existing holes in a plate that was on my bumper. I have no idea why the holes were there in the first place, but I went ahead and used them.
For the end caps, I used some drawer latches. I saw many others that used various cords, cables, etc, but those setups didn't feel right to me. I had wanted to do a latch/hinge combination, but I couldn't find any hinges that would fit once I took into account the extra thickness for the rivets.

There's a matching latch on each side.
I've also added some much needed counter lights. Before the counter had practically no light to speak of and the overhead domes don't do much when you're between it and whatever you're working on.

The lights are just some white LED strips I had bought at Costco years ago for some incabinet lighting that I never used. So I harvested them from there and installed in the TT.
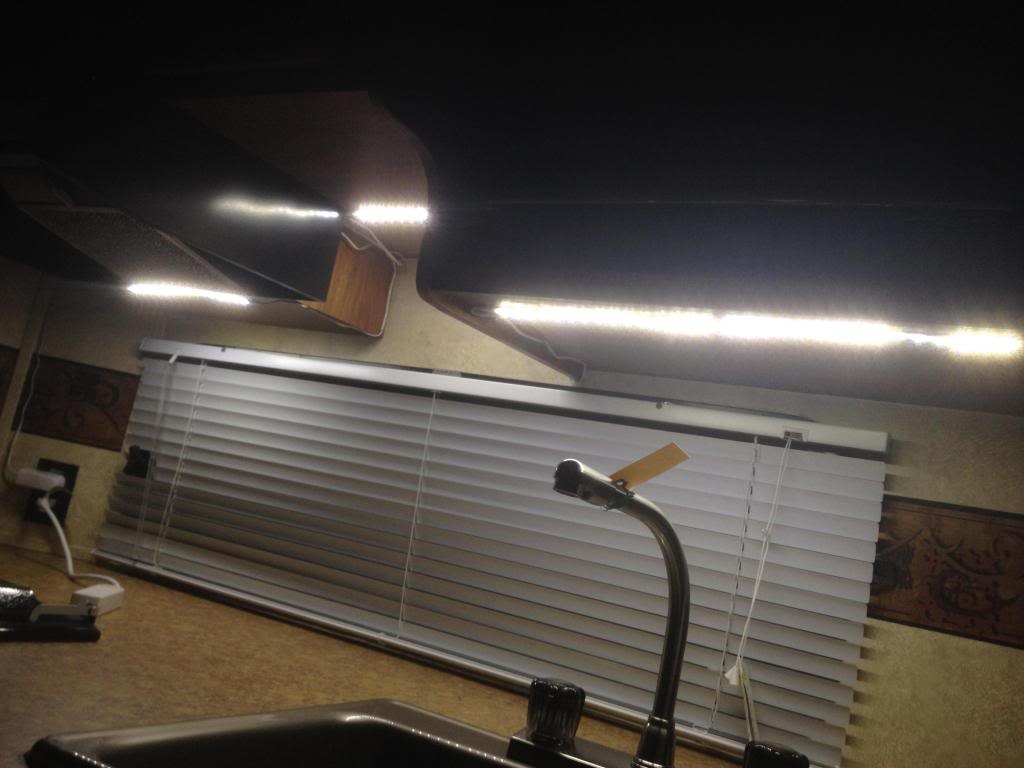
The switch for the LEDs is installed next to the hood fan, where it'll be relatively out of sight.

I've also rewired my TV and Genesis as well as leveraged some space behind a dead panel to get an extra shelf, but I seem to forgotten to snap those shots so I'm going to have to update again later to include that mod.
__________________
There's no use crying over spilt milk... unless it's on your keyboard.
|
|
|
|
|
04-17-2014, 06:28 PM
|
#9
|
|
Toy-aholic
Join Date: Mar 2010
Location: Chalfont, PA
Posts: 710
|
I did the same sewer hose mod but on TOP of the bumper...hope you don't go in any dips(sloped exit driveways etc) or that mod will be gone.
__________________
2005 GMC Sierra 3500 SLT DRW 6.6 D/A
2013 Crusader 335BHS TE
|
|
|
|
|
04-17-2014, 07:05 PM
|
#10
|
|
Moderator Emeritus
Join Date: Apr 2013
Posts: 5,173
|
Quote:
Originally Posted by EXGMTech

I did the same sewer hose mod but on TOP of the bumper...hope you don't go in any dips(sloped exit driveways etc) or that mod will be gone.
|
I thought about on top of the bumper, petty much for that reason, but I figured:
1) If I put it on top then the eavestrough would slide over the bolts, potentially causing issues.
2) On top I couldn't use both sides, since the ladder would block one end.
3) Hard to see from the pics, but the stab jacks technically sit lower than that, and I haven't been anywhere I've bottomed those out so hopefully it'll be fine.
__________________
There's no use crying over spilt milk... unless it's on your keyboard.
|
|
|
|
|
04-17-2014, 08:31 PM
|
#11
|
|
Member
Join Date: May 2013
Location: PCB
Posts: 46
|
nice mods but I'm not sure I understand the purpose of having the running Lights on. Is this when your already setup at the camp sight.
|
|
|
|
|
04-17-2014, 10:05 PM
|
#12
|
|
Always Learning
Join Date: Nov 2011
Location: Four Corners, FL
Posts: 21,891
|
Quote:
Originally Posted by Sistahazel
nice mods but I'm not sure I understand the purpose of having the running Lights on. Is this when your already setup at the camp sight.
|
Yep.
__________________
Officially a SOB with a 2022 Jayco Precept 36C
Checkout my site for RVing tips, tricks, and info | Was a Fulltime Family for 5 years, now we're part-timing on long trips
|
|
|
|
|
04-17-2014, 10:39 PM
|
#13
|
|
Senior Member
Join Date: Sep 2013
Location: Colorado
Posts: 258
|
Oh my god you used the holy bumper holes of antioch!!!!! Repent!!!!
__________________
Eric, Tara, and most of China
2013 Camping Nights: 2
2014 Camping nights: 31
TT 2014 Rockwood Roo 183
TV 2012 Nissan Armada

|
|
|
|
|
04-18-2014, 05:36 AM
|
#14
|
|
Toy-aholic
Join Date: Mar 2010
Location: Chalfont, PA
Posts: 710
|
Quote:
Originally Posted by Sistahazel
nice mods but I'm not sure I understand the purpose of having the running Lights on. Is this when your already setup at the camp sight.
|
X2
and some put a flasher in too...very strange.
__________________
2005 GMC Sierra 3500 SLT DRW 6.6 D/A
2013 Crusader 335BHS TE
|
|
|
|
|
04-18-2014, 10:51 PM
|
#15
|
|
Moderator Emeritus
Join Date: Apr 2013
Posts: 5,173
|
Finally Modded!
Yeah, they're for use once I'm setup at camp. They have three different functions:
1) Act as party lights when I'm camping with that kind of crowd.
2) Make the TT easier to spot when camping in dark locations and you need to do an end of night nature call.
3) the side marker light is just the right height to let me see what's on our outside table without having to pop on the more powerful outside light.
I do monitor the feel of the campground and I wouldn't use them unless I'm in a like minded campground or I'm isolated. So you won't have to worry about me running them in the local KOA where my awning is practically touching my neighbour's slide. But you might notice some lights through the brush at the local provincial park where there's 20' of growth between me and my neighbours.
P.s. I don't get the flasher either. I only saw that once and that was in a CG where I felt it would have been impolite to run them.
__________________
There's no use crying over spilt milk... unless it's on your keyboard.
|
|
|
|
|
04-19-2014, 12:43 AM
|
#16
|
|
Senior Member
Join Date: Apr 2014
Location: SC
Posts: 176
|
Kaadk could you do a "how to" on the light box switch that the seven pin plug connected into.
I always used a fused link plugged into the 2 connectors to make the lights come on but I like this better.
__________________
Tim

|
|
|
|
|
04-19-2014, 08:03 AM
|
#17
|
|
2014 XLR 27HFS
Join Date: Apr 2014
Location: Clearwater, FL
Posts: 493
|
Those counter lights look awesome, got me thinkin'...
__________________
Dave & Audrey

|
|
|
|
|
04-22-2014, 02:46 PM
|
#18
|
|
Moderator Emeritus
Join Date: Apr 2013
Posts: 5,173
|
Quote:
Originally Posted by tlambert
Kaadk could you do a "how to" on the light box switch that the seven pin plug connected into.
I always used a fused link plugged into the 2 connectors to make the lights come on but I like this better.
|
Not much to do a "How To" on. It's the same thing as your fused link. Just made easier with a harness.
1) Go pick up a 7-pin harness from your local walmart, autozone, canadian tire, etc...
2) Go get a waterproof box.
3) Put the 7 pin harness in the box.
4) Wire the fused link to the harness across the same pins you do today (3 & 4)
If desired:
5) Put a switch along the link so you can turn them on/off.
Next time I pull the TT out of storage I'll snap a pic of the inside of the box so you can see it's just a wire from harness to fuse to switch back to harness.
__________________
There's no use crying over spilt milk... unless it's on your keyboard.
|
|
|
|
|
04-22-2014, 03:27 PM
|
#19
|
|
Senior Member
Join Date: Apr 2014
Location: SC
Posts: 176
|
Quote:
Originally Posted by Kaadk
Not much to do a "How To" on. It's the same thing as your fused link. Just made easier with a harness.
1) Go pick up a 7-pin harness from your local walmart, autozone, canadian tire, etc...
2) Go get a waterproof box.
3) Put the 7 pin harness in the box.
4) Wire the fused link to the harness across the same pins you do today (3 & 4)
If desired:
5) Put a switch along the link so you can turn them on/off.
Next time I pull the TT out of storage I'll snap a pic of the inside of the box so you can see it's just a wire from harness to fuse to switch back to harness.
|
Haha I guess your right. I'm a visual learner.
Yeah pics would be good.
__________________
Tim
|
|
|
|
|
04-24-2014, 10:22 AM
|
#20
|
|
Senior Member
Join Date: Aug 2012
Location: North Texas
Posts: 203
|
Quote:
Originally Posted by Kaadk
Not much to do a "How To" on. It's the same thing as your fused link. Just made easier with a harness.
1) Go pick up a 7-pin harness from your local walmart, autozone, canadian tire, etc...
2) Go get a waterproof box.
3) Put the 7 pin harness in the box.
4) Wire the fused link to the harness across the same pins you do today (3 & 4)
If desired:
5) Put a switch along the link so you can turn them on/off.
Next time I pull the TT out of storage I'll snap a pic of the inside of the box so you can see it's just a wire from harness to fuse to switch back to harness.
|
Look up "Trailer Beacon", this guy makes them ready to go, not sure what raw materials would cost to do yourself
__________________
2011 Puma Unleashed 27SBU - SOLD
2013 Sabre 32bhok-6 - SOLD
2012 Ford F250 6.2 - SOLD
2017 Heartland Cyclone 3800
2016 Ford F350 6.7 DRW
B&W Companion
|
|
|
|
|
|
 Posting Rules
|
You may not post new threads
You may not post replies
You may not post attachments
You may not edit your posts
HTML code is Off
|
|
|
|
 » Recent Discussions
 |
|
|
|
|
|
|
|
|
|
|
|
|
|
|
|
|
|
|
|
|
|
|
|
|
|
|
|
|
|
|
|
|
|


 Linear Mode

