 |
|
 12-06-2018, 12:40 PM
|
#14801
|
|
Senior Member
Join Date: May 2018
Location: Hills of Northwestern PA
Posts: 2,321
|
Got the FlowJet maceator pump in. $185 via eBay.
Won't get a chance to run connector wires to the house battery till spring. Will wait till then to order the 3/4" 100' garden hose I have in my amazon wishlist 
Ordered in a hose repair kit to fix a couple of my older hoses to use for various duties around the TT and several sewer items. Screw in fitting for dump pipes, three level sewer hose seal adapter, a couple sets of sewer hose storage caps, clear waste valve cap with garden hose fitting, 10' potable water hose.
Until I got a TT, who'd a thunk I could ever get excited over proper sewer connections!
I've had several times where the 10' fresh water hose would have been handy, I have two 25' already.
I also had some drainage past the dump valves get me, yuk. At least I'll see it now before it happens and could mostly drain it via the garden hose connection first. I think what happened was me changing a broken valve handle on a drained tank, not so completely drained, operating the valve to check its function & then forgetting about the possibilities when hooking up next camping trip ;(
__________________
2019 Cherokee Wolf Pup 16BHS flipped axle, 5K springs, 400AH LiFePO4, 3K inverter, 400 watts CIGS solar
2019 Ford F-150 S-Crew 5.5 bed V8 w/tow package, ITBC, Tow Mirrors, 3.55, SumoSprings, 7000# GVWR, 1990#CC
Husky Centerline TS WDH 400-600# spring bars
|

|

|
|
12-06-2018, 01:00 PM
|
#14802
|
|
54 Years, 13 RV's
Join Date: Sep 2017
Location: Northern Colorado
Posts: 846
|
"I've had several times where the 10' fresh water hose would have been handy, I have two 25' already. "
I've taken a 25' hose, cut 10' off and added a male/female connector to the cut ends to give me that 10' footer and a 25' footer option without having to carry yet another hose along. Just be careful to get the hose ends oriented correctly.
__________________
2021 Rockwood 2511S
2020 GMC 1500 6.2L
|
|
|
|
|
12-06-2018, 03:14 PM
|
#14803
|
|
Senior Member
Join Date: Sep 2017
Posts: 264
|
Quote:
Originally Posted by Johnfort

"I've had several times where the 10' fresh water hose would have been handy, I have two 25' already. "
I've taken a 25' hose, cut 10' off and added a male/female connector to the cut ends to give me that 10' footer and a 25' footer option without having to carry yet another hose along. Just be careful to get the hose ends oriented correctly.
|
Ive done that also and even carry a five foot section that comes in surprisingly handy. I made up a 12 foot power cord that can double as an extension as well. Its much easier to wipe down before storage than the 30 footer that came with the coach and gives me 40 feet in case I ever need it.
|
|
|
|
|
12-06-2018, 04:17 PM
|
#14804
|
|
54 Years, 13 RV's
Join Date: Sep 2017
Location: Northern Colorado
Posts: 846
|
Quote:
Originally Posted by xgarys
Ive done that also and even carry a five foot section that comes in surprisingly handy. I made up a 12 foot power cord that can double as an extension as well. Its much easier to wipe down before storage than the 30 footer that came with the coach and gives me 40 feet in case I ever need it.
|
I accidentally stumbled upon that idea by damaging a power cord one time. I was really broken up about it because it was a nearly new, expensive 50' power cord that I'd cut 10' off of. Then after I put the plugs on it, I realized what a good deal it was, so I started doing it with hoses too.
__________________
2021 Rockwood 2511S
2020 GMC 1500 6.2L
|
|
|
|
|
12-06-2018, 05:03 PM
|
#14805
|
|
Senior Member
Join Date: May 2018
Location: Hills of Northwestern PA
Posts: 2,321
|
Quote:
Originally Posted by Johnfort
I accidentally stumbled upon that idea by damaging a power cord one time. I was really broken up about it because it was a nearly new, expensive 50' power cord that I'd cut 10' off of. Then after I put the plugs on it, I realized what a good deal it was, so I started doing it with hoses too.
|
I did that with a lot of 12AWG power cords that I used for PA systems, even buying in bulk and making many different lengths to be able use darn near the exact lengths needed. BUT I would take a large HEAVY crate full of them to the gig. I try to keep to a tight weight reducing program with the TT due to its and my TV capacities. IF I were to damage power or water lines, yup, I'd just make shorter sections and end up with a similar total length and weight
This will put me me at 60' of potable water line. Plus, I have a 25-30' water hose for cleaning. IF I take the FlowJet along, then I'll add a 100' 3/4" waste hose to the load (different color, no mixups!).
__________________
2019 Cherokee Wolf Pup 16BHS flipped axle, 5K springs, 400AH LiFePO4, 3K inverter, 400 watts CIGS solar
2019 Ford F-150 S-Crew 5.5 bed V8 w/tow package, ITBC, Tow Mirrors, 3.55, SumoSprings, 7000# GVWR, 1990#CC
Husky Centerline TS WDH 400-600# spring bars
|
|
|
|
|
12-07-2018, 10:09 PM
|
#14806
|
|
Senior Member
Join Date: Jan 2011
Location: Part Timing It Now
Posts: 3,455
|
DW decided the kitchen needed a face lift. So........ new Furrion oven/range, convection microwave & new Samsung residential fridge to replace the Dometic Elite 2+2.
The stove & microwave were easy enough, direct replacements and slid right in. I just needed a 12v supply for the Furrions LED lit knobs
The fridge project took a bit more planning The original Dometic Elite RM1350 was installed above a large drawer. DW didn't want to loose the large drawer space which the new residential fridge height would necessitate . Fortunately, there was a blank space under the stove large enough to accommodate a drawer although a little smaller.
I had to cut the existing drawer & rebuild it to fit in the new smaller space under the stove.
Then, I went to work rebuilding the "box" to accept the larger residential fridge.
First, I had to address the 2 large outside vents & come up with a plan to block them off. I decided to leave the vents in place and seal them up from the inside using white coroplast and 1/8" luan. After applying some adhesive sealant to the inside edge of the opening, covered the vents using the coroplast/luan "sandwich".
Second, I had to re-plumb the propane line since I was doing away with the propane fridge. Since I needed all the depth I could get, I had to find a solution for the routing of the propane line which ran along the floor behind the original drawer space, through the adjacent cabinet to the stove. I eliminated the "T" and replaced it with nipple to reconnect the line to the stove.
I then built the framework for a raised floor & left the propane line running along it's original route. The new raised floor gave me unobstructed space for the new fridge to be able to go all the way against the back wall. I capped off the 12v feed that fed the 12v side of the Dometic & also relocated the 110v recepticle into the adjacent drawer space & cleaned up all the loose hanging wires.
__________________
 "PT Crew Members Since 9/2010"
2011 RAM 2500 HD 6.7L CTD Crew
2014 Prime Time Sanibel 3250
|
|
|
|
|
12-07-2018, 10:41 PM
|
#14807
|
|
Senior Member
Join Date: Nov 2014
Posts: 1,740
|
impressive
|
|
|
|
|
12-07-2018, 10:48 PM
|
#14808
|
|
Pickin', Campin', Mason
Join Date: Aug 2015
Location: South Western PA
Posts: 19,143
|
Nice job!
Question about the new stove... does the oven pilot have a piezoelectric lighter or is it still manual light?
I thought I read or was told at a show the new ovens didn't require standing on your head to light the pilot.
__________________
2022 Cedar Creek 345IK 5th WheelSolar & Inverter2024 Ford F-Series SCREW7.3L4x4Factory PuckB&W CompanionTST Tire Monitor w/RepeaterSinemate 3500w Gen.
F&AM Lodge 358 Somerset, PA - JAFFA Shrine - Altoona, PA
Days Camped ☼ '19=118 ☼ '20=116 ☼ '21=123 ☼ '22=134 ☼ '23=118☼ '24=90
|
|
|
|
|
12-07-2018, 11:48 PM
|
#14809
|
|
Senior Member
Join Date: Nov 2015
Posts: 4,223
|
Quote:
Originally Posted by 5picker
Nice job!
Question about the new stove... does the oven pilot have a piezoelectric lighter or is it still manual light?
I thought I read or was told at a show the new ovens didn't require standing on your head to light the pilot.
|
Looks like the same Furion I have. It does have the electric spark lighter but I feel that's a piece of junk. You have to turn the oven to "ON", hold the oven temp select knob in to let pilot light gas start to flow and then twist the left knob to create the spark.
Problem is, you have to hold the knob in for about 10 seconds..or 16 seconds...or 12 seconds...or...well, you get the picture. During that time you have to keep clicking the spark knob while you are standing on your head to watch for the pilot light to come on.
I don't bother with it any more. I just stand on head, put a Bic fireplace lighter into the oven, hold the pilot knob until it lights. I've seen it light in as little as five seconds or as much as 30 seconds.
__________________
BIRDS ARENT REAL
|
|
|
|
|
12-08-2018, 07:21 AM
|
#14810
|
|
Senior Member
Join Date: Dec 2014
Location: Illinois
Posts: 174
|
How did you mount the fridge so it doesn't come sliding out.
|
|
|
|
|
12-08-2018, 09:52 AM
|
#14811
|
|
Senior Member
Join Date: Jan 2011
Location: Part Timing It Now
Posts: 3,455
|
Quote:
Originally Posted by 5picker
Nice job!
Question about the new stove... does the oven pilot have a piezoelectric lighter or is it still manual light?
I thought I read or was told at a show the new ovens didn't require standing on your head to light the pilot.
|
Nice word for the igniter....never heard that one before.
Yes! The new stove's oven lights with the same "clicker" that the burners use. Turn the clicker/igniter and all 4 burners/oven spark.
But, note, that the oven can be tempermental to light.....probably because of the very small amount of gas released just for the pilot. Some times it can take 5 seconds or so of turning the igniter before the pilot lights. 
__________________
"PT Crew Members Since 9/2010"
2011 RAM 2500 HD 6.7L CTD Crew
2014 Prime Time Sanibel 3250
|
|
|
|
|
12-08-2018, 09:56 AM
|
#14812
|
|
Senior Member
Join Date: Jan 2011
Location: Part Timing It Now
Posts: 3,455
|
Quote:
Originally Posted by Crusader 816
How did you mount the fridge so it doesn't come sliding out.
|
Still working on that as well as a mechanism to keep the doors closed during travel.
__________________
"PT Crew Members Since 9/2010"
2011 RAM 2500 HD 6.7L CTD Crew
2014 Prime Time Sanibel 3250
|
|
|
|
|
12-08-2018, 10:01 AM
|
#14813
|
|
Senior Member
Join Date: Jan 2011
Location: Part Timing It Now
Posts: 3,455
|
Quote:
Originally Posted by emm-dee
Looks like the same Furion I have. It does have the electric spark lighter but I feel that's a piece of junk. You have to turn the oven to "ON", hold the oven temp select knob in to let pilot light gas start to flow and then twist the left knob to create the spark.
Problem is, you have to hold the knob in for about 10 seconds..or 16 seconds...or 12 seconds...or...well, you get the picture. During that time you have to keep clicking the spark knob while you are standing on your head to watch for the pilot light to come on.
I don't bother with it any more. I just stand on head, put a Bic fireplace lighter into the oven, hold the pilot knob until it lights. I've seen it light in as little as five seconds or as much as 30 seconds.
|
X2 It can get a little aggravating sometimes. 
But, she still loves the stove, it cooks & looks great, she's happy & that's what counts. 
__________________
"PT Crew Members Since 9/2010"
2011 RAM 2500 HD 6.7L CTD Crew
2014 Prime Time Sanibel 3250
|
|
|
|
|
12-08-2018, 10:46 AM
|
#14814
|
|
Senior Member
Join Date: Dec 2014
Location: Illinois
Posts: 174
|
Looks really nice.
|
|
|
|
|
12-10-2018, 04:45 PM
|
#14815
|
|
Senior Member
Join Date: Apr 2016
Posts: 600
|
Quote:
Originally Posted by rracer5
DW decided the kitchen needed a face lift. So........ new Furrion oven/range, convection microwave & new Samsung residential fridge to replace the Dometic Elite 2+2.
The stove & microwave were easy enough, direct replacements and slid right in. I just needed a 12v supply for the Furrions LED lit knobs
The fridge project took a bit more planning The original Dometic Elite RM1350 was installed above a large drawer. DW didn't want to loose the large drawer space which the new residential fridge height would necessitate . Fortunately, there was a blank space under the stove large enough to accommodate a drawer although a little smaller.
I had to cut the existing drawer & rebuild it to fit in the new smaller space under the stove.
Then, I went to work rebuilding the "box" to accept the larger residential fridge.
First, I had to address the 2 large outside vents & come up with a plan to block them off. I decided to leave the vents in place and seal them up from the inside using white coroplast and 1/8" luan. After applying some adhesive sealant to the inside edge of the opening, covered the vents using the coroplast/luan "sandwich".
Second, I had to re-plumb the propane line since I was doing away with the propane fridge. Since I needed all the depth I could get, I had to find a solution for the routing of the propane line which ran along the floor behind the original drawer space, through the adjacent cabinet to the stove. I eliminated the "T" and replaced it with nipple to reconnect the line to the stove.
I then built the framework for a raised floor & left the propane line running along it's original route. The new raised floor gave me unobstructed space for the new fridge to be able to go all the way against the back wall. I capped off the 12v feed that fed the 12v side of the Dometic & also relocated the 110v recepticle into the adjacent drawer space & cleaned up all the loose hanging wires.
|
Thanks for taking the time to post, i enjoyed reading it and seeing the pics
|
|
|
|
|
12-11-2018, 06:51 PM
|
#14816
|
|
Senior Member
Join Date: Jan 2011
Location: Part Timing It Now
Posts: 3,455
|
Quote:
Originally Posted by pbandrb
Thanks for taking the time to post, i enjoyed reading it and seeing the pics
|
 I appreciate the appreciation. 
__________________
"PT Crew Members Since 9/2010"
2011 RAM 2500 HD 6.7L CTD Crew
2014 Prime Time Sanibel 3250
|
|
|
|
|
12-13-2018, 12:03 PM
|
#14817
|
|
Senior Member
Join Date: Jul 2011
Location: Pinellas Co.
Posts: 139
|
Added an electric tongue jack. Finally got tired of hand cranking after almost six years. [emoji23]
20 minute job turned into 90 after shearing off one of the old bolts. Yes, I used a penetrating fluid, but the bolt sheared with no warning. No big. Used SS hardware on the new jack.  
__________________
2008 Honda Ridgeline
2013 Rockwood Mini Lite
10k Equali-i-zer WDH
Tekonsha Prodigy P2 Brake Control
|
|
|
|
|
12-13-2018, 03:46 PM
|
#14818
|
|
Jayhawker
Join Date: Jul 2018
Location: Suburbs Kansas City
Posts: 290
|
Electric tongue jack
tony5oh, you are a better man than me. I replaced mine after just one trip....LOL 
|
|
|
|
|
12-13-2018, 04:35 PM
|
#14819
|
|
Senior Member
Join Date: May 2018
Location: Hills of Northwestern PA
Posts: 2,321
|
I've got an electric tongue jack on my Amazon wish list, if Santa's listening
Just ordered a Camco Evo water filter, plastic stand for the filter, and a "water bandit" hose connector from WalMart. BEST price for the filter and stand. Compared Camping World, Amazon, and eBay. It appears to use standard home water filters.
__________________
2019 Cherokee Wolf Pup 16BHS flipped axle, 5K springs, 400AH LiFePO4, 3K inverter, 400 watts CIGS solar
2019 Ford F-150 S-Crew 5.5 bed V8 w/tow package, ITBC, Tow Mirrors, 3.55, SumoSprings, 7000# GVWR, 1990#CC
Husky Centerline TS WDH 400-600# spring bars
|
|
|
|
|
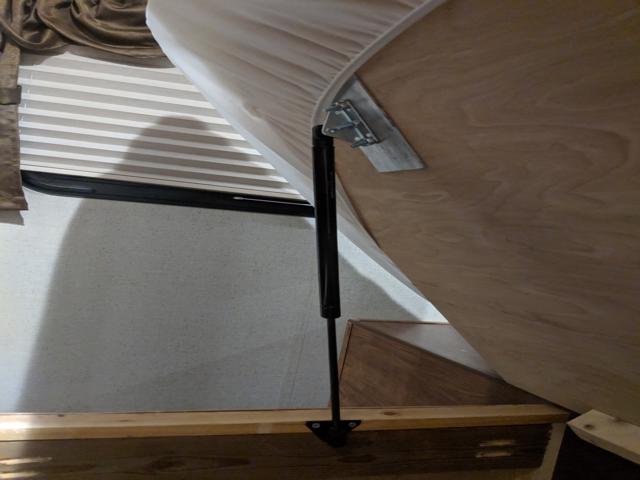
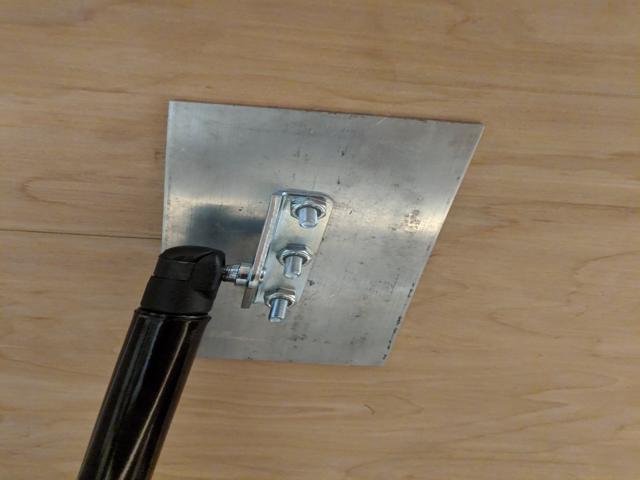
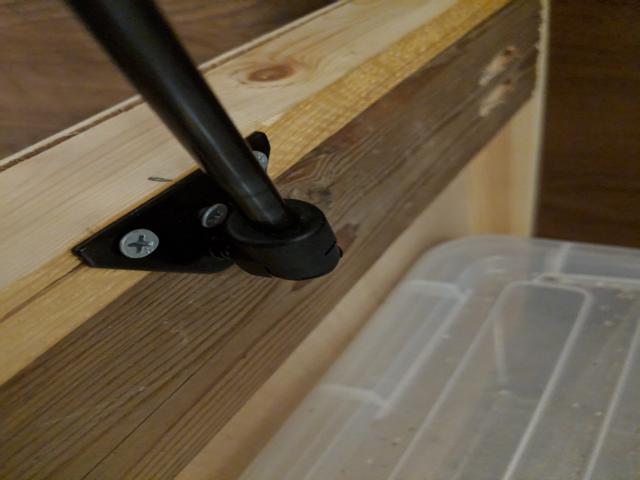
12-14-2018, 10:07 PM
|
#14820
|
|
Senior Member
Join Date: Jul 2017
Location: California
Posts: 7,616
|
|
|
|
|
|
|
 Posting Rules
|
You may not post new threads
You may not post replies
You may not post attachments
You may not edit your posts
HTML code is Off
|
|
|
|
 » Recent Discussions
 |
|
|
|
|
|
|
|
|
|
|
|
|
|
|
|
|
|
|
|
|
|
|
|
|
|
|
|
|
|
|
|
|
|


 Linear Mode

